How to Use Compression on Vocals
Compression can go one of two ways: well or badly. It can be your best friend when you use it right, but not so much if you don’t.
If you overdo it, compression can ruin a good vocal recording pretty quickly. But if you get it right then applying compression can make your vocals sound professional and modern! With this in mind, wouldn’t you like to know how to use compression on vocals?
This guide is going to show you how to apply compression to vocals professionally and confidently. The output will be a vocal recording that’s as easy to mix as it is to listen to. To get this result, we’re going to explain how to apply tonal and dynamic compression, parallel compression, and also limiting!
If you stick around until the end there’s also a vocal compression cheat sheet you can download and keep!
Dynamic Consistency is Key
Before we dig in, we should cover what could be a game-changer for you. It’s important that you have intention behind your action. What is it that you’re trying to achieve with your compression? Applying compression to your vocals “because you’re supposed to” is going to get you nowhere fast. Every plugin and decision you make with compression (and general mixing) must be purpose-led.
When we’re mixing vocals, our goal should be to make them as dynamically consistent as possible. A vocal recording sits above everything else in a mix. Every word is clear and of a similar volume. So, if you’ve been hunting for an intention to have behind your compression decisions then this may be a starting point for you.
But the truth is that having a dynamically consistent vocal recording isn’t just down to compression. Before you even insert a compressor on your vocal channel, you need to have the right gain staging and gain automation in place.
But what does the right gain staging and gain automation look/sound like?
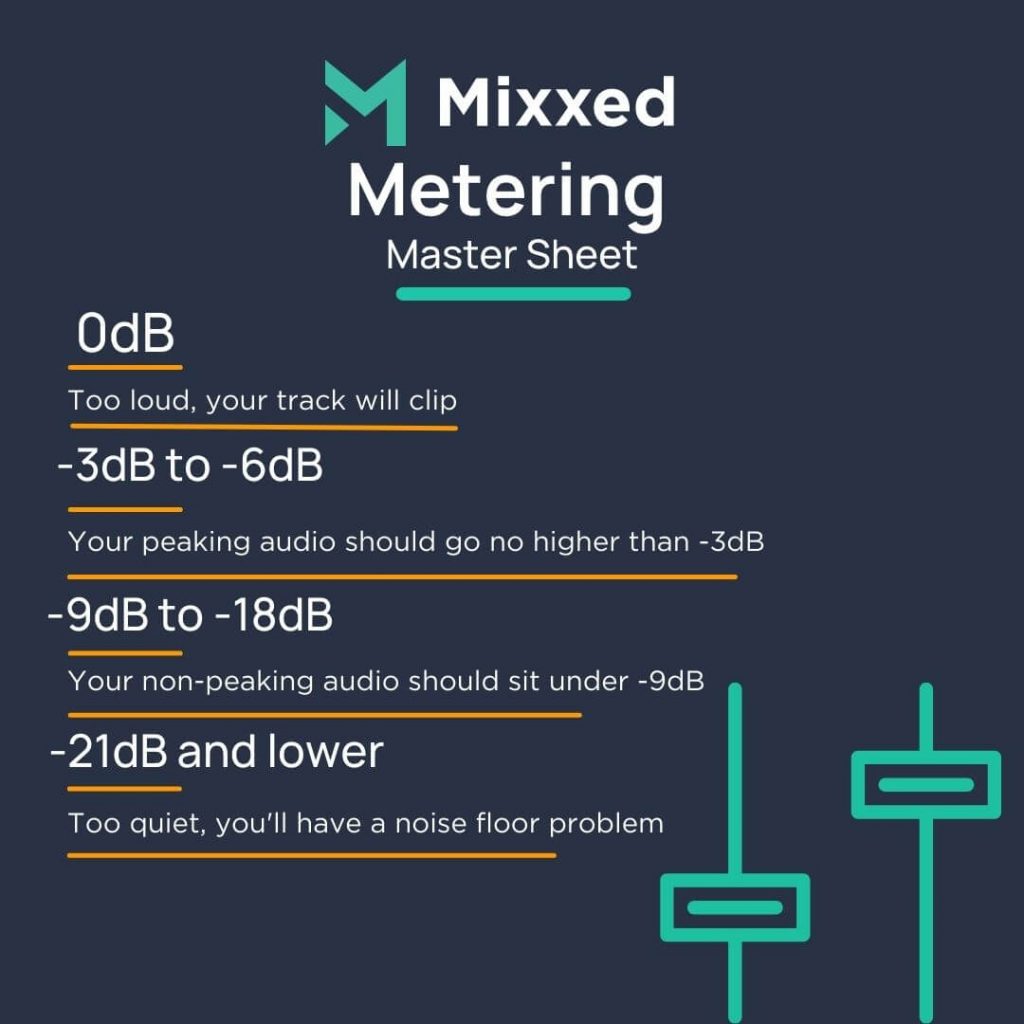
On average, any signals that aren’t louder and peaking should not be breaching -9dB on your dBFS meter. But even this can be too loud. Therefore, it’s well accepted that the average dBFS level of your non-peak audio should be sitting at around -18 dBFS.
As for your peaking audio, it shouldn’t really be any louder than -6dBFS. In short, we use effective gain staging like this to ensure we leave enough headroom in our mix. Headroom is very important for mastering!
But the gain isn’t only concerned with the position of gain faders and dBFS meters. As you insert plugins, make sure you’re checking for any differences in gain before and after you switch the plugin on. If you find the gain difference is too high or low, simply use the Output/Volume knob on the plugin to raise or lower the output volume of the plugin.
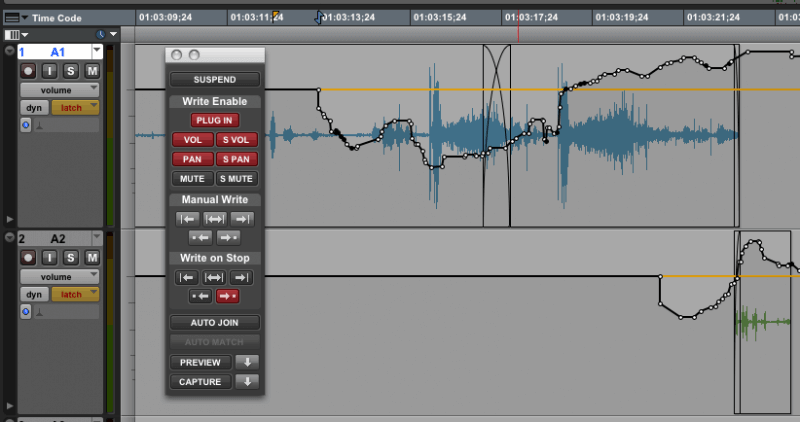
Finally, let’s talk about gain automation. We use gain automation to make sure the gain (not volume) of our vocals is consistent across the board. That means automating the vocal gain to increase when other elements are louder. It also means automating it to attenuate when there is less going on in the rest of the mix.
It may take you quite some time to achieve this goal, but it’s done in every professional mix. It’s worth your time! In so doing, you save your compressor a lot of stress. The advantage here is your signal is cleaner and already dynamically consistent before it goes into your compressor plugin. This makes our vocals easier to mix!
How to Compress Your Vocals
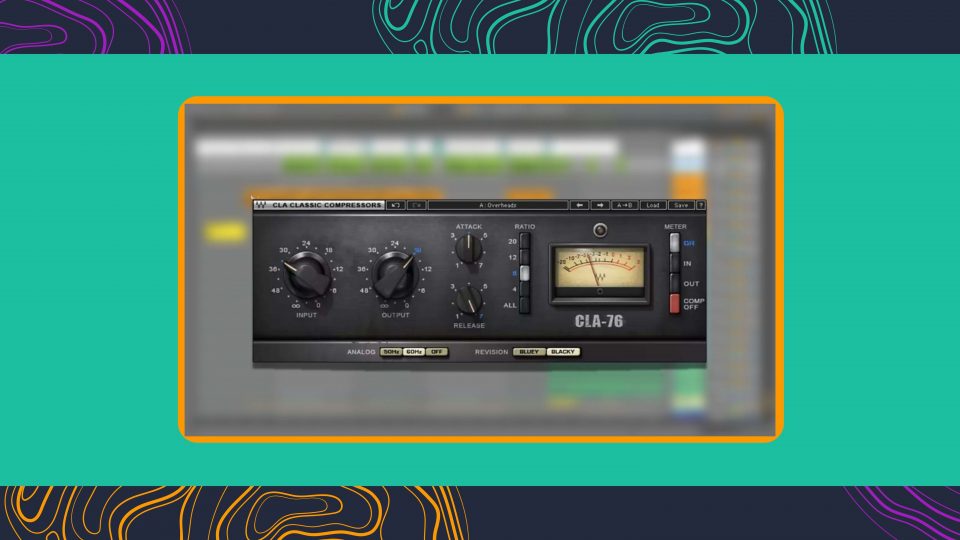
Okay, let’s get into it. Using multiple compressors throughout the mixing process (serial compression) will help you allow you to achieve a natural-sounding compression.
For example, use a chain of compressors that each apply weaker compression on your vocals. Using one compressor which applies heavy compression may just over-compress your vocals. But using two or three compressors that apply 2-3dB of gain reduction each gives you much more control over the compression of your vocals.
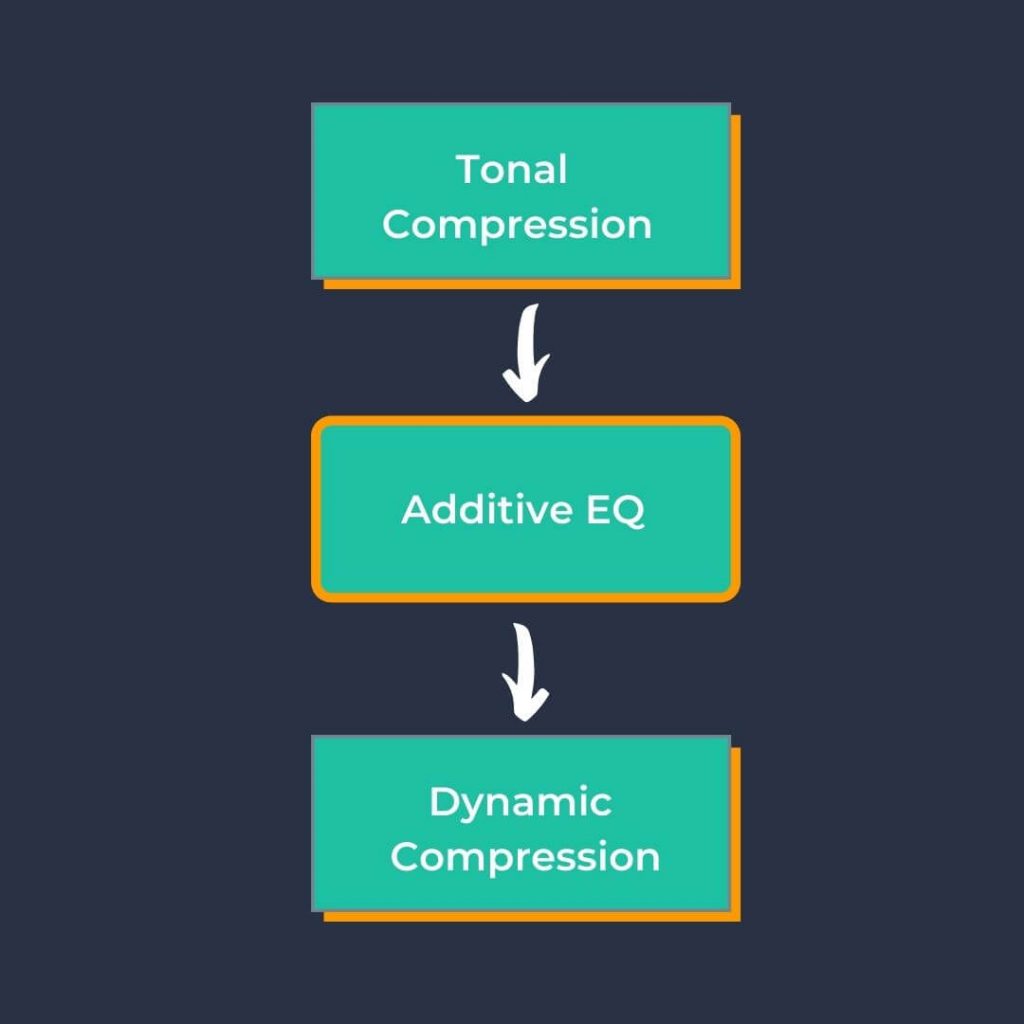
However, this doesn’t mean you should apply compressor after compressor after compressor. Rather, insert a compressor for tonal compression, then additive EQ’ing, then a second compressor for dynamic compression will allow your vocals to take better shape. Inserting other plugins and effects in between your compressors allows your signal to sound cleaner, more professional, and its details more audible.
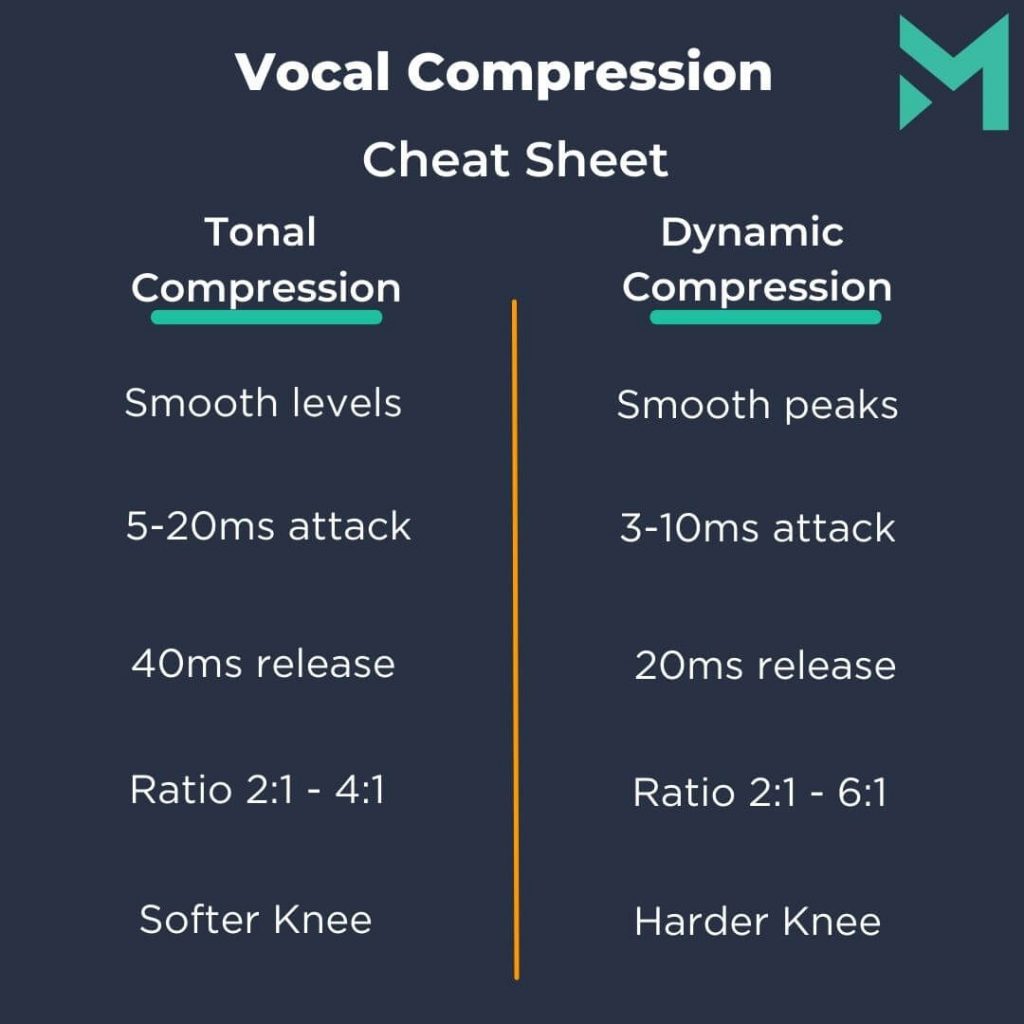
How to Use Tonal Compression on Vocals
Before you apply any dynamic compression, using lighter compression allows you to enhance the tone of your vocals. Though it does add some dynamic control, it’s more about smoothing out the levels than anything else.
For effective tonal compression, using a slower attack and release time avoids over-compressing the transients. Squashing any transients will only push your vocals back in your mix. The main parameter that will set the tone of your vocal is the attack time. Therefore, you should spend the necessary time dialling it in and adjusting it in your mix after your compressor is set.
Then attenuate your threshold control only so much so that your compressor is engaging on every word. Then set a low ratio so you’re only applying 2-3dB of gain reduction. Below is a step by step guide for applying compression in a musical fashion.
- Load up your chosen compressor.
- Then attenuate the threshold control and raise the ratio – both to extreme settings. Now you can hear the compressor working clearly.
- Now raise your attack time to around the 15ms mark and then and adjust it to your taste either side. A faster attack of 5ms, for example, will give your vocals a thicker sound. A slower attack will give your vocals a punchier sound.
- Now head to your release time of and dial in 40ms and adjust to taste. The goal here is to get your compressor pumping in time with the music.
- The final step is to adjust your threshold and ratio until you are averaging 2-3dB of gain reduction.
Atack time is the main parameter to focus on. It is what dictates the tone of your vocal! A faster attack time, even if you set it to release as soon as possible will make the vocals sound loud and aggressive. If your compressor has knee control, set it to be softer rather than sharper.
How to Use Dynamic Compression on Vocals
This approach to compression is about catching the louder peaks and reducing their volume. For lighter genres, this type of compression might not be appropriate.
To do this, a faster attack time and higher ratio are needed.
As we are only trying to catch the louder peaks, a higher threshold is also needed. You don’t want to compress every word (like with tonal compression), you only want to compress the louder peaks.
You still need to be careful not to compress the transients too much, as this will put the vocals further back in the mix. Use a faster attack time, but try not to go below 1ms.
Adjust the release time so that the compressor breathes with the music, or use a fast release time for more loudness and aggression.
This time, the process is slightly different:
- Load up a compressor (any will do).
- Set the ratio to 10:1 (and the knee to ‘hard’).
- Adjust the threshold until the compressor is only engaging on the louder peaks, not every word.
- Start with a medium-fast attack time of around 3-10ms. You can try using a slower attack time for more aggression, or a faster attack time for more weight (but don’t go too far below 2ms as you will put the vocal further back in the mix).
- Set the release time to 20ms and adjust until the compressor is breathing in time with your music. Try using a fast attack time for more aggression.
- Lower the ratio to somewhere around 2:1 until the compressor is applying 2-3dB of gain reduction (or 6-10dB for heavier genres).
Vocal Compression Cheat Sheet
Is it time to put your new knowledge to the test with some epic vocal samples?
The sampling revolution has risen in popularity and shaped music since the early 1970s. Sample culture continues to transform how millions of artists and producers do their thing in DAWs.
You too can break conventional norms, challenge the status quo, and open Pandora’s box of sound design.
Mixxed works with a growing number of sample labels and contributors to provide you with an affordable sample subscription service that’s more accessible than any before.
You’ll have access to our growing catalogue of loops, one-shots and sound effects that you can browse, download and keep forever for less than $3 a month.
Sign up today to find your sound!