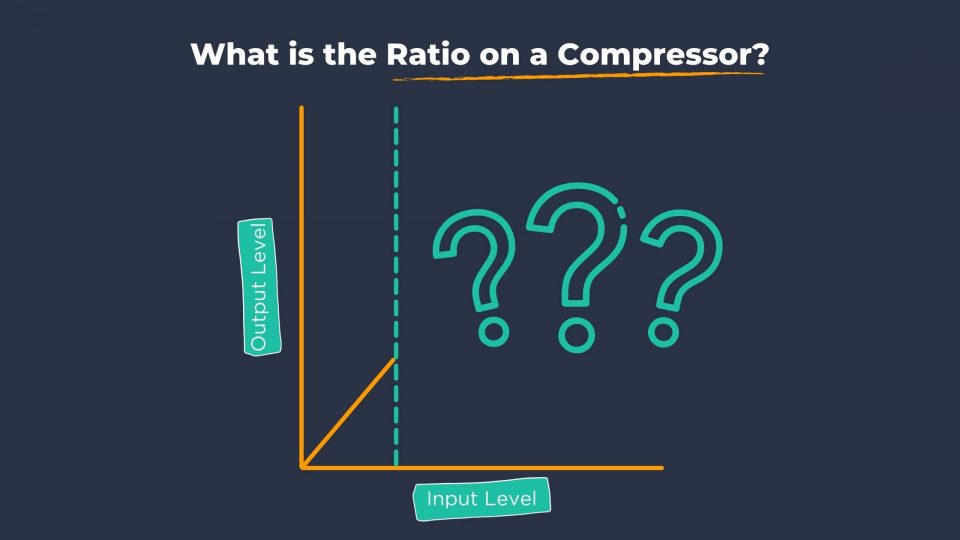
What is the Ratio on a Compressor?
A compressor ratio is one of the most misunderstood parameters in music production. But when you understand what its purpose is and how to use it properly, your sounds and mixdowns will rise in quality very quickly.
Many beginners don’t understand what an audio compressor ratio is actually doing to their sound. Well, it’s time to change that.
Audio Compressor Ratio Explained
Put simply, a compression ratio is what sets the amount of gain reduction (or amplification in upwards compression) your compressor will apply to your signal. Additionally, a compressor expresses ratio levels in decibels (dB). However, your audio compressor will not kick in whatsoever until your signal breaches the threshold that you have set.
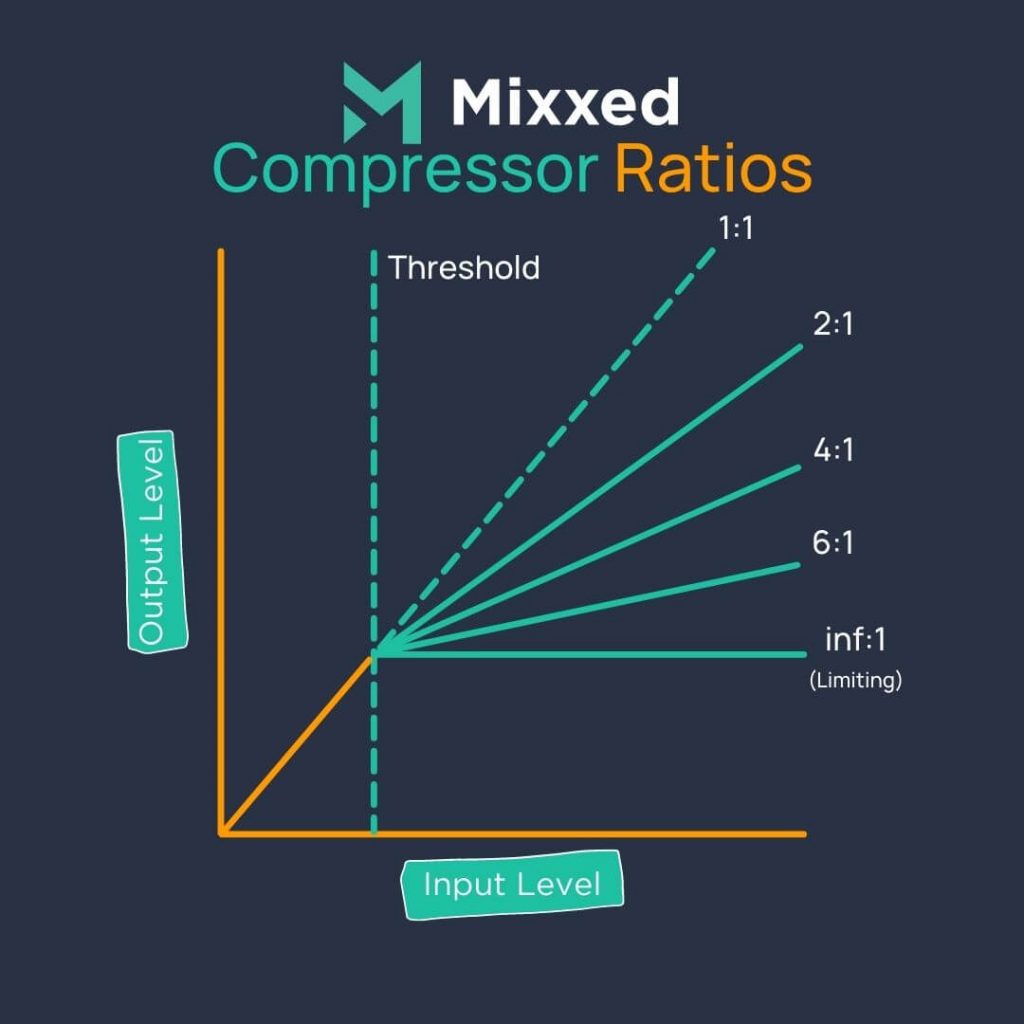
Let’s talk about an example. With a ratio of 2:1, your compressor will attenuate your signal by 1dB for every 2dB that your signal breaches the threshold. If you have a ratio of 4:1, your signal will be attenuated by 1dB for every 4dB that your signal breaches.
But at the extreme end of compressor ratios, we have limiters. A limiter essentially sets a dB ceiling that your signal cannot breach whatsoever. This is why it’s called limiting! Furthermore, the ratio for limiting is 10:1 (or higher) or inf:1, as we have presented in the above image.
And if your ratio is 1:1 then no compression will occur whatsoever.
You should be starting to see that the ratio parameter on your compressor is where a lot of your attention should be at. Too high a ratio will flatten your sound, and too low a ratio won’t do the whole job.
With all of this in mind, now you can better grasp that your ratio knob is what determines the amount of compression that the compressor will apply. The numbers themselves are indicators that relate to the ratio of input to output.
If you use a higher ratio then you’ll get more compression.
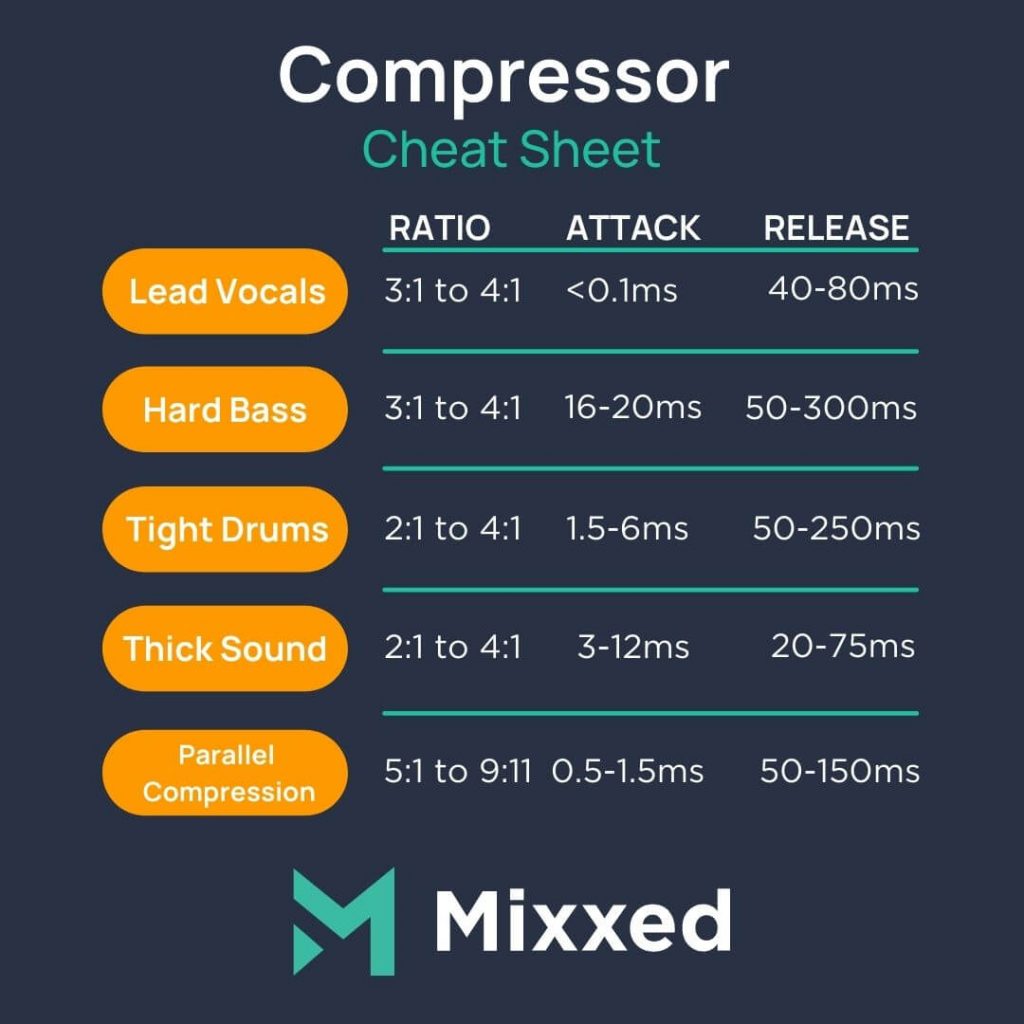
The ratios available on any given compressor do depend on the type and manufacturer of the compressor. Below is a list of common ratio settings available on pretty much every compressor.
Compressor Ratio Cheat Sheet
- 1:1 applies no compression. The input and output levels remain the same regardless of the threshold level.
- 1.5:1 applies subtle compression. This ratio is gentle and transparent sounding. It will preserve the natural peaks and valleys.
- 2:1 applies light compression. This ratio smoothly controls the dynamics without causing noticeable changes to tone and punch.
- 3:1 applies moderate compression. This ratio setting is slightly more aggressive. It applies gentle transient control while retaining natural dynamics.
- 4:1 applies medium compression. This ratio has tighter control over transients. There will be subtle changes to tone, punch, and loudness.
- 10:1 applies heavy compression. This ratio is aggressive. It will dramatically reduce dynamic range, causing a signal to lose punch, clarity, and presence if pushed hard.
- 20:1 to Infinity:1 is limiting. At Infinity:1, the compressor essentially blocks the signal from crossing the threshold.
Put your new compression skills to the test. Why not find some new sounds to get started with compression ratios?
The sampling revolution has risen in popularity and shaped music since the early 1970s. Sample culture continues to transform how millions of artists and producers do their thing in DAWs.
You too can break conventional norms, challenge the status quo, and open Pandora’s box of sound design.
Mixxed works with a growing number of sample labels and contributors to provide you with an affordable sample subscription service that’s more accessible than any before.
You’ll have access to our growing catalogue of loops, one-shots and sound effects that you can browse, download and keep forever for less than $3 a month.
Sign up today to find your sound!