
The Art of Vocal Tuning and Pitch Correction
Vocal tuning and pitch correction have become fundamental tools in modern music production. Ensuring pitch-perfect vocals is a crucial element of achieving professional-sounding tracks. In this guide, we’ll delve into the art of vocal tuning and pitch correction within a Digital Audio Workstation (DAW). We’ll explore the nuances of these processes and equip you with the knowledge and techniques to achieve outstanding results.
Understanding Vocal Pitch
Before we jump into the technical aspects, let’s grasp the fundamental concept of vocal pitch. Pitch, in the context of music, refers to the perceived highness or lowness of a sound. Human voices are incredibly dynamic and can naturally vary in pitch, which makes vocal tuning and pitch correction an indispensable tool.
The challenge lies in refining these variations to create a pitch-perfect performance that aligns with the musical context. This is where DAWs come into play.

The Role of DAWs in Vocal Tuning
Digital Audio Workstations (DAWs) are the epicentre of modern music production. These software platforms offer a comprehensive toolkit for recording, editing, and refining audio. When it comes to vocal tuning and pitch correction, DAWs provide the necessary infrastructure and tools to make the magic happen.
Popular DAWs for Pitch Correction:
- Pro Tools: A widely-used DAW in professional studios.
- Logic Pro X: Known for its comprehensive pitch correction capabilities.
- FL Studio: Offers a variety of pitch correction plugins.
- Ableton Live: Features real-time pitch correction plugins.
In the next sections, we’ll explore the steps you need to take to prepare your vocals for tuning, the essential tools and features within your DAW, and both manual and automatic pitch correction techniques.
Preparing Your Vocals for vocal tuning
Recording Techniques for Pitch Correction
The foundation of vocal tuning starts at the recording stage. Here are some best practices to ensure your vocals are ready for the pitch correction process:
- Use High-Quality Microphones: Invest in a good quality microphone to capture clear and accurate vocals. Check out this blog for a rundown of some of our top microphone picks if you’re on a budget.
- Adequate Mic Technique: Train the vocalist to sing consistently into the microphone to minimize pitch fluctuations.
- Isolate Vocals: Record vocals in a quiet environment to avoid unwanted background noise.
- Multiple Takes: Record multiple takes to have options during the editing phase.
Organizing Vocal Tracks
Once your vocals are recorded, it’s crucial to keep them organized within your DAW:
- Create Separate Tracks: Dedicate individual tracks for each vocal part (lead, harmony, backing).
- Naming Conventions: Label your tracks with clear names to easily identify them.
- Grouping: Use track grouping to manage vocal sections efficiently.
The Importance of a Clean Recording
Pitch correction works best with clean recordings. Avoid over-processing the audio during recording. Excessive compression or effects can make it challenging to correct pitch accurately.
Tools and Features for Vocal Tuning
Pitch Correction Plugins: Many DAWs come equipped with built-in pitch correction plugins. Alternatively, there are a myriad of 3rd party plugins capable of some pretty serious vocal alchemy. These plugins are the key to achieving precise pitch control. Here are a few that you might encounter:
- Auto-Tune: A popular real-time pitch correction plugin known for its natural-sounding results.
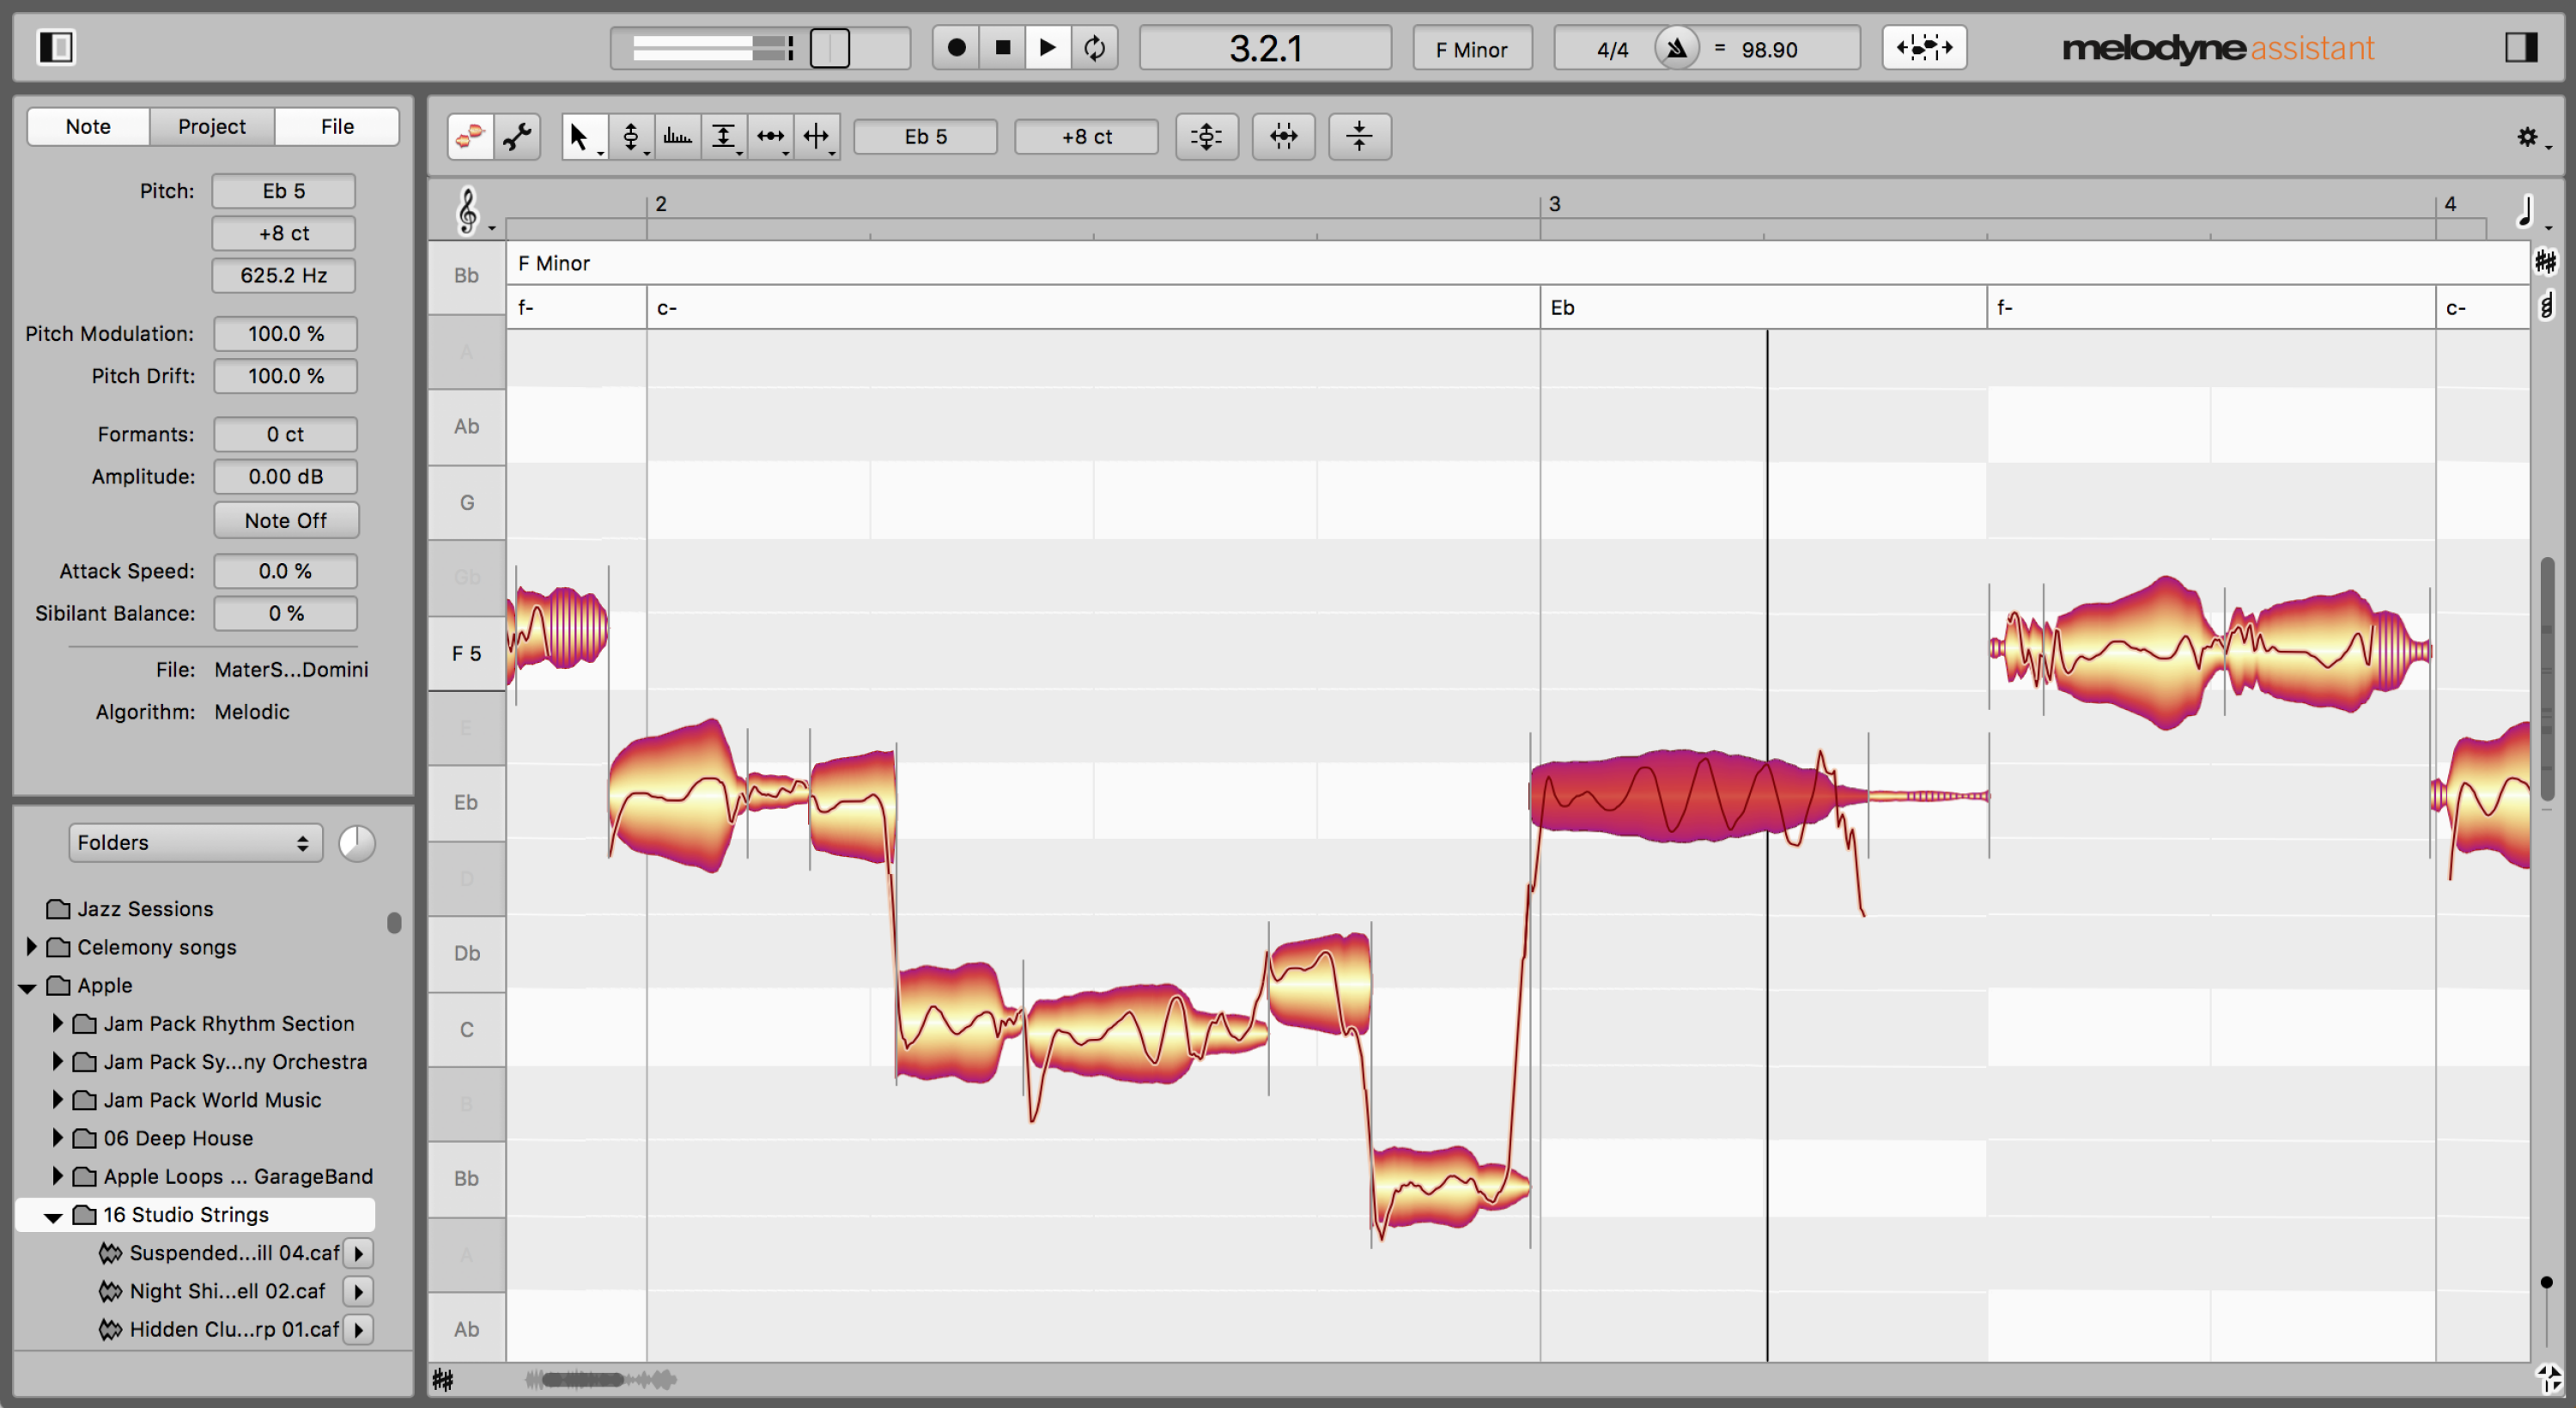
- Melodyne: Offers detailed pitch and time editing for a highly customized approach.
- Waves Tune: A user-friendly plugin with various pitch correction modes.
- Celemony Capstan: Ideal for eliminating pitch drift in recorded material.
Auto-Tune vs. Manual Tuning: DAWs and plugins offer both automatic and manual tuning options. Auto-tune plugins detect and correct pitch automatically, while manual tuning gives you more control over each correction.
Manual Pitch Correction
Step-by-Step Guide to Manual Tuning
- Select the Problem Areas: Identify the sections with pitch issues.
- Zoom In: Zoom in on the waveform for precise editing.
- Adjust Pitch: Use your DAW’s pitch correction tool to fine-tune the pitch.
- Adjust Timing: Address any timing issues if necessary.
- Smooth Transitions: Ensure that corrected areas blend naturally with the rest of the performance.
Using Pitch Correction Tools in a DAW
DAWs often provide dedicated tools for pitch correction, such as a Pitch Editor or Flex Pitch. These tools allow you to make precise adjustments to pitch and timing directly on the vocal track without affecting the vocal’s timing.
Tips for a Natural-Sounding Result
While perfect pitch is the goal, it’s essential to maintain a natural, human quality in the vocals. Here are some tips:
- Avoid Overcorrection: Don’t make pitch corrections too extreme; small adjustments often yield the most natural results.
- Retain Vibrato: Preserve the singer’s vibrato for an authentic sound.
- Listen Closely: Pay attention to how the correction affects the vocal’s character.
Automatic Pitch Correction
How Automatic Tuning Works
Auto-tune plugins like the eponymous Auto-Tune or Waves Tune work by detecting the pitch of incoming audio and automatically adjusting it to the nearest desired note. The speed and sensitivity settings determine how aggressively the plugin corrects pitch.
Pros and Cons of Auto-Tune Plugins
Pros:
- Speed: Provides real-time pitch correction.
- Ease of Use: Beginner-friendly with minimal manual adjustments.
- Consistency: Ensures pitch accuracy across the entire track.
Cons:
- Loss of Nuance: May sacrifice the character of the performance.
- Artefact Risk: Overcorrection can lead to unnatural artefacts.
- Limited Customization: Less control over the correction process.
Settings and Parameters for Automatic Correction
When using auto-tune plugins, pay attention to settings like retune speed, scale selection, and formant preservation. These settings can significantly impact the correction’s character.
The Art of Vocal Tuning
Vocal tuning and pitch correction, when done meticulously, can transform a good performance into a remarkable one. Here are some key considerations to ensure you achieve perfect results from your vocal tuning:
Balancing Perfection and Authenticity
While the goal of pitch correction is to achieve precise pitch, it’s crucial to maintain the authenticity of the vocal performance. Overly aggressive pitch correction can lead to a robotic and lifeless sound. Here’s how to strike the right balance:
- Listen Critically: Pay close attention to the vocal performance and the corrections made. Use your ears as your most valuable tool.
- Selective Correction: Identify the sections that truly require correction and focus on those areas.
- Minimalism: Make subtle pitch adjustments rather than trying to correct every note perfectly.
Retaining the Singer’s Style
Every vocalist has a unique style, including vibrato, tone, and phrasing. It’s essential to preserve these elements in the final recording. Here’s how:
- Preserve Vibrato: Vibrato is a natural part of vocal expression; don’t remove it entirely.
- Tone Preservation: Avoid altering the singer’s natural tone or timbre.
- Phrasing: Ensure that the corrected pitch aligns with the singer’s intended phrasing.
The infamous ‘Autotune effect’

Several artists have pushed Auto-Tune to its limits, cranking it up to the maximum. This bold experimentation has led to the creation of an entirely new vocal style. The impact of this innovative approach, often referred to as the “Auto-Tune effect,” has significantly shaped the sonic landscape of contemporary popular music in recent years.
Cher’s 1998 hit “Believe” is often credited as one of the songs that brought Auto-Tune into the mainstream. The track features a noticeable, shimmering robotic effect on Cher’s vocals, which became known as the “Cher Effect.” Achieving this effect involves using Auto-Tune in a unique way:
- Aggressive Auto-Tune: Use Auto-Tune with a higher correction speed and a distinctive retune speed. This approach creates a pronounced, robotic sound.
- Note Choices: Experiment with note choices to make the pitch corrections more obvious. Embrace a futuristic, otherworldly quality.
- Doubling: Duplicate the vocal track and apply Auto-Tune to one while keeping the other untouched. This creates a blend of natural and processed vocals.
The “Cher Effect” introduced the world to the creative potential of Auto-Tune as an artistic tool, not just for correction.
While Cher’s 1998 anthem was very much in the dance idiom, Hip-Hop artist T-Pain is widely recognised as the first artist to use it as an effect within Urban music forms. Kanye West went on to cement its dominance as a vocal style with his 2008 LP 808’s & Heartbreak. The autotune effect shows little sign of waning in popularity and has become firmly embedded within the 808-drenched trap musical landscape.
Common Vocal Tuning Mistakes to Avoid
While vocal correction technology is a veritable godsend in the audio world, let’s highlight some common pitfalls to steer clear of when it comes to vocal tuning:
- Overcorrection: Avoid making pitch corrections too extreme, which can lead to unnatural results.
- Neglecting Timing: Pitch and timing often go hand in hand; addressing one without the other can lead to awkward phrasing.
- Lack of Listening: Listening critically during the tuning process is essential. Rely on your ears to guide your decisions.
Final Thoughts
Vocal tuning and pitch correction are essential tools for music producers and audio engineers. When used thoughtfully, they can elevate a vocal performance to new heights while maintaining the artist’s unique style and expression.
We encourage you to practice and experiment as you strive to perfect your vocal tuning skills. Thank you for joining us on this journey through the art of vocal tuning and pitch correction. We wish you the best of success in your musical endeavours.
Remember – RouteNote Create subscriptions start from as little as $2.99. You also get 10 FREE credits to spend on samples along with access to our FREE sample pack bundle when you sign-up!