How to turn an image into a Serum wavetable
So you’ve been using your favourite wavetable synth Serum forever and are getting a little bored of those same banks of wavetables you’ve been using since day dot… well I’m here to tell you that there is a super easy and effective way to get UNLITMITED wavetables to keep that creative energy moving.
Lets explore how wavetables work, and how you can most effectively make some yourself using image files.
How wavetables work
Wavetables serve as a versatile tool in sound synthesis, allowing musicians and producers to create a wide array of sounds by dynamically scanning through a collection of waveforms, modulating parameters to shape timbre and pitch. A wavetable is essentially a collection of single-cycle waveforms arranged in a table or grid. Each waveform in the table represents a snapshot of a sound wave at a specific point in its cycle. Wavetable synthesis involves scanning through this table of waveforms over time. The position in the wavetable, often called the “wavetable position” or “index,” determines which waveform is currently active.
Why use an image file
Image-based wavetable synthesis allows you to visualize the waveform directly in an image editor. The brightness or color of pixels in the image represents the amplitude or shape of the waveform at a specific point. Image files can encode complex and intricate waveform shapes that might be challenging to draw or describe manually. Users can create detailed, evolving, and unique waveforms by drawing or manipulating an image.
Importing your image into Serum
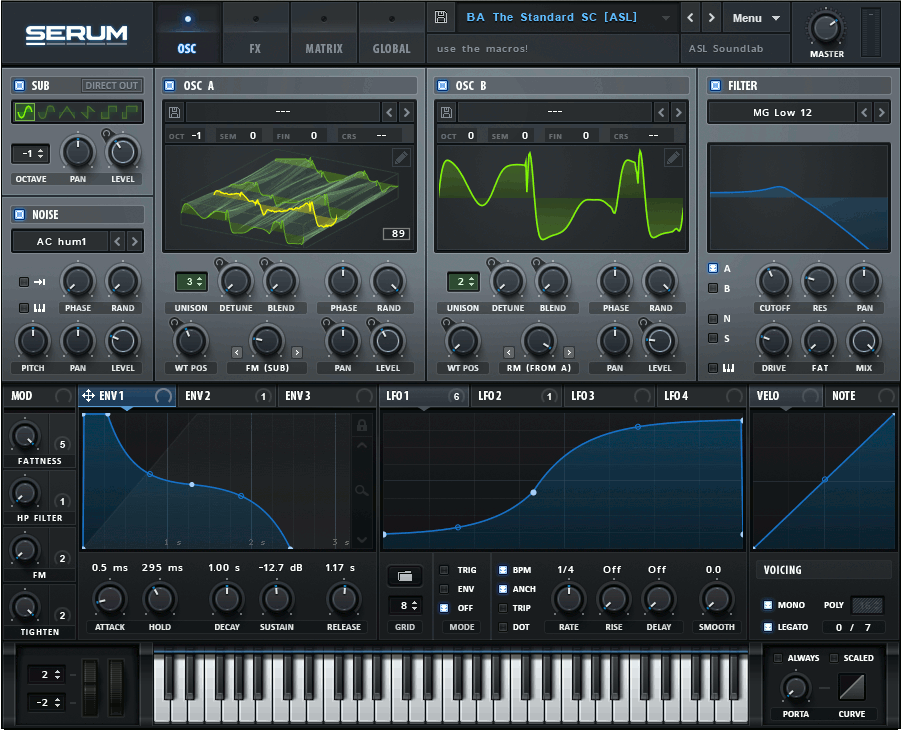
- Open Serum:
- Launch Serum in your digital audio workstation (DAW).
- Import an Image:
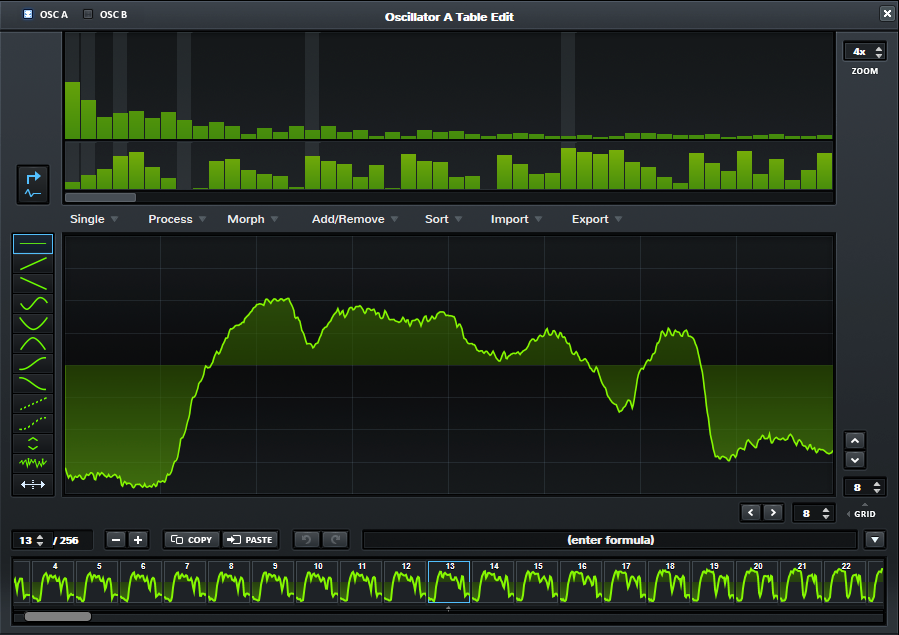
- Inside Serum, go to the Wavetable Editor.
- Click on “Menu” and then select “Import Audio/Wavetable.”
- Select an Image:
- Choose an image file you want to use for the wavetable.
- Adjust Settings:
- The “Import Options” window will appear.
- Adjust the settings based on your preferences:
- Method: Choose the method for converting the image (Brightness, Red, Green, Blue, etc.).
- Type: Select how the image channels should be mapped (Mono, RGB, etc.).
- Pitch Detection: Adjust if necessary for proper pitch detection.
- Generate Wavetable:
- Click “OK” to generate the wavetable from the selected image.
- Edit and Refine:
- Once the wavetable is generated, you can further edit and refine it in the Wavetable Editor.
- Use the pencil tool, wave draw tool, or other functions to modify the waveform’s shape.
- Modulation and Automation:
- Utilize Serum’s modulation and automation features to dynamically change the wavetable position, creating movement and evolving textures in your sound.
- Save Preset:
- After processing the image into a wavetable, consider saving your preset in Serum so you can easily recall the sound in future projects.
Tips:
- Experiment with different types of images to see how they influence the resulting wavetable.
- Pay attention to the Method and Type settings during the import process, as they significantly affect the sonic outcome.
- Modulate wavetable positions with envelopes, LFOs, or other modulation sources for evolving sounds.
- Use Serum’s effects and modulation capabilities to shape the final sound.
Remember that the creative possibilities are vast, and experimenting with different images and settings will yield a variety of unique and interesting wavetables for your music production.
Remember – RouteNote Create subscriptions start from as little as $2.99. You also get 10 FREE credits to spend on samples along with access to our FREE sample pack bundle when you sign-up!