Home Studio Acoustic Treatment Guide: How to Set Up Acoustic Treatment
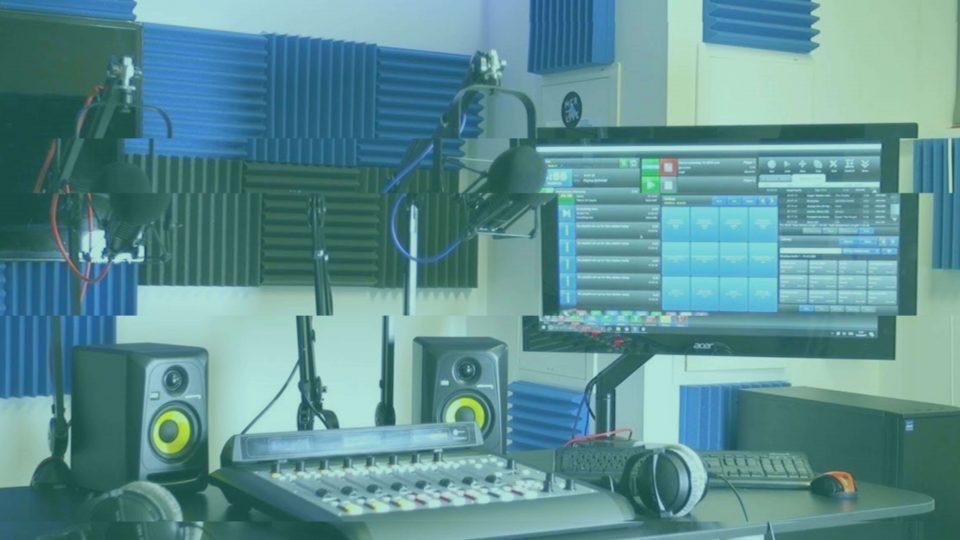
Sound is a natural beauty, but we need to control it in a music studio. Whether in a bedroom or a purpose-built studio, acoustic treatment is our friend. It helps us tame reflected sound so that our mic doesn’t pick it up and we can hear our monitors in an acoustically flat environment.
Have you ever clapped in your bedroom? Did you hear a sharp echo of the clap all around the room? That monstrosity is known as flutter echo, and it has no place in our recording studios.
Because you know how sound travels and what you can use to control it, you’re ready to learn how you can use acoustic treatment to your advantage and be rid of that pesky flutter echo.
Evaluate Your Room
Assessing how badly your room suffers from the reflected sound is a must. To do this we use the clap test, so start walking around your room and clap from every point in the room! This’ll inform you as to where treatment will be best placed.
Usually, you’ll hear something between these two options:
In the best-case scenario, all that you’ll hear is a pleasant reverb (which is what usually occurs in rooms with tall ceilings).
In the worst-case scenario, you’ll hear a very metallic ringing that’s harsh on your ears (flutter echo).
The closer the result is to the worst-case scenario, the more absorption panels your room needs to make the room sound drier and disarm reflected sound.
If you’re not so sure what you’re hearing, we recommend that you do the clap test in multiple rooms to get a good reference and understanding of what good and/or bad acoustics sound like.
How to Set Up Bass Traps
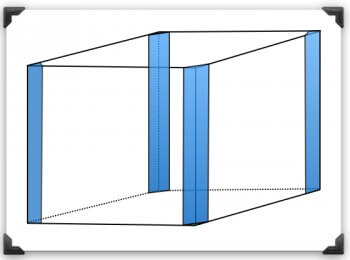
There are two types of bass traps available to you as a home studio producer. These are:
- Triangular corner bass traps
- Flat-panel bass traps

The advantage of using corner bass traps is that they have more mass to them. With more mass comes better taming of lower frequencies.
Flat-panel bass traps use the second method of taming low-end sound which leaves an open-air gap between the wall and the panel, which has its own advantage of covering more surface area with less material.
Each has its own advantages, but you can use either one and they’ll work just fine!
Recommended by expert blogs such as E-Home Recording Studio are the following bass traps:
For corner traps, check these out:
- Auralex LENRD – (Amazon/B&H/Thomann)
- Auralex MegaLENRD – (Amazon/B&H)
- Auralex ATOM-12 System – (Amazon/B&H)
For panel traps:
- Auralex Sonolite – (Amazon/B&H)
- Primacoustic Cumulus Corner Trap – (Amazon/B&H)
- Ultimate Acoustics Beveled Trap – (Amazon/B&H)
You probably have a small budget, and that’s okay. The truth is that most home studios can benefit from as many as 20+ bass traps. If this many will stretch your budget, we recommend starting with about 4 to 8 or 4 to 10 bass traps. As time goes on and you can save your hard-earned money, you can always add more!
How to Choose Your Starting Point
The most important factor in any acoustic treatment setup is, yes, their setup. The end result depends on the positioning of each panel.
The starting point for bass traps should be the corners of your room, demonstrated by the red dots in the image below.
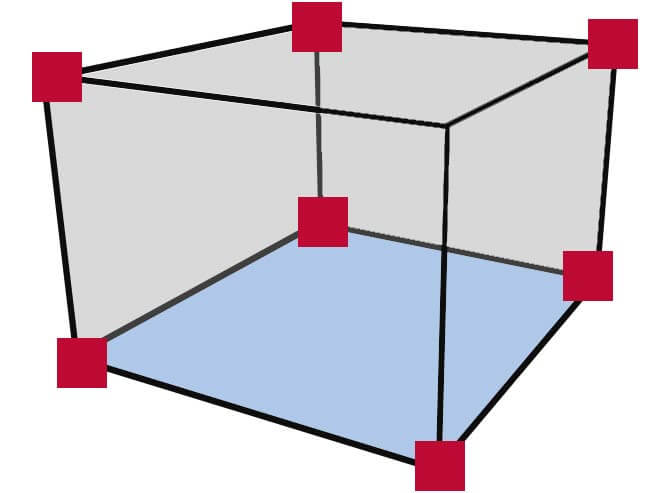
These red dots represent trihedral corners. These always get first priority because the parallel walls always converge with one another at these points. There are three points of contact.
Next up, you’ve got your dihedral corners. These are the black lines in the image. You can see that dihedral corners are always the meeting point of two walls.
With this in mind in terms of placement, where, in your room, is there a meeting point of three walls (i.e, corners), and where is there a meeting point of two walls?
Step 1
Place a bass trap in each trihedral corner of your room. If you only have four traps, place them in the upper corners. If you have eight, place them in the lower ones too!
If you have or will have more, begin placing them between the upper and low traps in each corner.
Step 2
Now that you have the trihedral corners all sorted, it’s time to work on your upper dihedral corners!

Now that you’ve filled each of these corners with bass traps, your low end is as dry as you’re going to get it. Your high end should be sounding much drier too!
Now, let’s move on to panels to really tidy up that high end reflected sound…
How to Set Up Acoustic Panels
When shopping for acoustic/absorption panels, there are factors to keep in mind.
- Thickness
- Surface Pattern
- Dimenions & Amount of Needed Panels
- NRC (Noise Reduction Ceritificate) Rating
Thickness
Usually, panels are either 2″ or 4″ thick. 2″ is the industry standard, but if you think “thicker is better” then go for 4″.
4″ panels will always absorb frequencies better than 2″ panels, so it’s a worthwhile investment. However, remember that you already have your bass traps doing a lot of the work, so 4″ may just be overkill.
Surface Pattern
You’ve probably seen the cool 3D patterns that come on patterns. Maybe you even get lost looking at them like I do…
The two most common patterns are wedge and pyramid patterns.
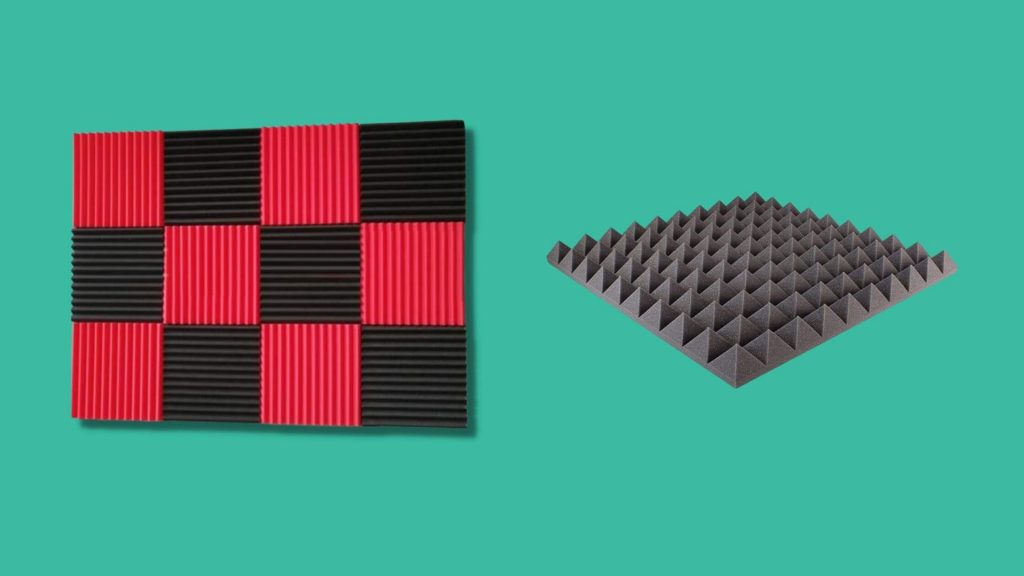
The differences in the result that each pattern produces is minimal and you probably won’t notice at all. There is no single pattern that is “the best”!
Choose which one you like the most!
Dimensions & Amount of Panels
If you bought a bundle of panels, which we advise you to, you’d find they come in packs of 6, 12 and 24.
Panels have a standard size of either 1 foot per square meter, 2 feet per square meter, or 2 by 4 feet.
On its own, a panel’s dimensions are meaningless numbers. But when combined with multiple panels, it’s a valuable number because they make up the total surface area of the wall that you have covered.
The desired amount of coverage is dependant on the size of the room, but 48 square feet is a good dimension to aim for! Don’t worry about filling this space up straight away. You have your bass traps carrying the team, so you can slowly build up your panels.
As you’re creating a home studio, you don’t want to damage your walls. To solve this problem, purchase smaller panels because you can use non-permanent adhesives to stick them to the wall which we’ll cover shortly.
Noise Reduction Certificate
NRC represents how good a product is at absorbing sound.
Rated between 0 – 1, all reputable brands have an NRC rating in order to verify their product as fit for purpose. You may have figured it out, but if the rating is closer to 1, the product is better at absorbing sound… well, sort of.
An NRC rating is pretty much worthless in a recording studio. When tests are undertaken, only frequencies of 2000 Hz, 1000 Hz, 500 Hz & 250 Hz are under examination to see how well the product absorbs the sound.
Keep an eye out for NRC ratings. They could still give you an idea of how the panels will perform but don’t rely on them.
How to Position Your Acoustic Panels
You’ve mounted your bass traps and your panels are in the box ready to go. Two basic steps you can take before worrying about the whole room are:
The first place to stick panels is directly behind your studio monitors.
If you have any empty spaces on your dihedral corners, use some panels to fill them!
To know just how much wall you need to cover with acoustic panels, you should continue doing the clap test. As you’ve filled the room with bass traps and some panels, it’ll sound a lot drier. The only way to truly know where panels will be most effective is to keep clapping!
A handy trick to know when you’re on a budget is to keep one area of a wall empty if you have a set of panels directly opposite. Panels on one wall are enough to kill standing waves in that area.
How to Place Acoustic Panels without Damaging Any Walls
As we said above, make sure you buy smaller panels if you don’t want to damage the walls. If you have to sell your panels in the future, people won’t want them with chunks missing either.
Here are our two favourite methods of making sure your smaller patterns stay stuck without losing chunks or damaging any walls!
Loctite General Purpose Spray Adhesive
These products will allow you to stick your panels to the walls of your room without the risk of removing paint, damaging the wall itself, or removing wallpaper… a sigh of relief if you’re living with your parents!
All music producers need to treat their room as much as possible, just as all producers use samples of one form or another. Is it time to entice more listeners by using the arsenal samples on Mixxed?
Utilize our artillery of royalty-free loops, one-shots, melodies, and more for less than $3 a month. We know we’ve got something for you.
We’ve taken care of all the copyright procedures so that you can spend more time creating whatever music it is you create.
Sign up today to give your listeners the ultimate music experience!