Music Production For Beginners: The Complete Guide For Music Producers
The world of music production can be a scary place. There’s so much to learn and so much technology to use.
Music production for beginners is really quite overwhelming, so we wanted to create a go-to guide that tells you everything you need to have in order to make music, what’s good to know in terms of acoustic treatment, and a brief guide to the main effects you’ll be using.
But before we get into that, we want you to be prepared for the long road ahead. Making music is not easy to learn. It has a lot of ups and downs, but if you grind through the downs and enjoy the ups then you’ve got a lot of prosp[ects ahead of you.
Making music isn’t a get-rich-quick scheme either. NFT’s and crypto are beginning to make dents in this rigid industry, but what that means for you, at least at the time of writing, is minimal.
So, focus on why you want to make music and what music you want to make. Music production for beginners is scary. But when you’ve been playing around with the software for a few months, got to grips with a few plugins, you’ll start to find your feet.
Later on in the article, we talk about sound design and plugins. There are so many choices of plugins and VSTs that it’s easy to lose your bearings. As you’re just starting out, pick one VST and a handful of plugins and stick with them. By doing this, you’ll learn them that much faster and speed up your creation process.
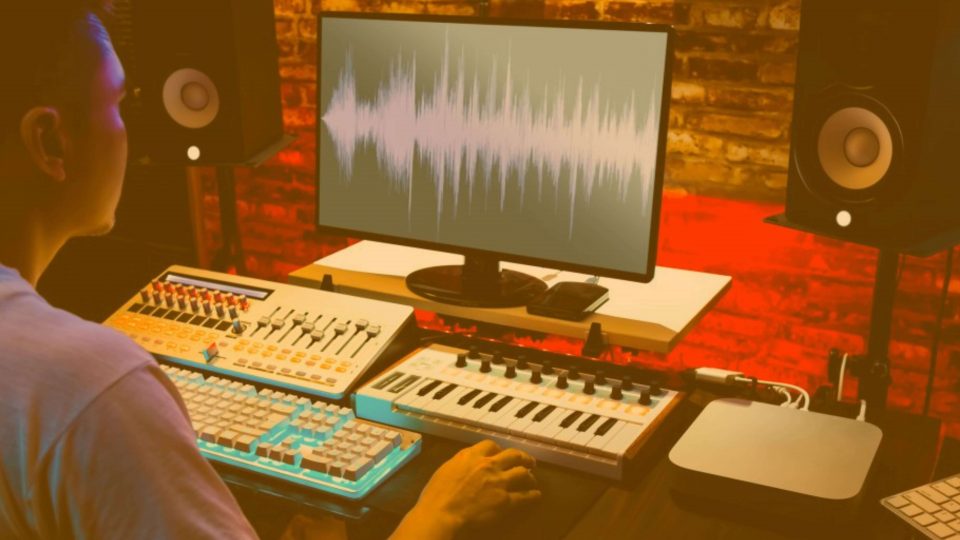
What You Need to Make Music
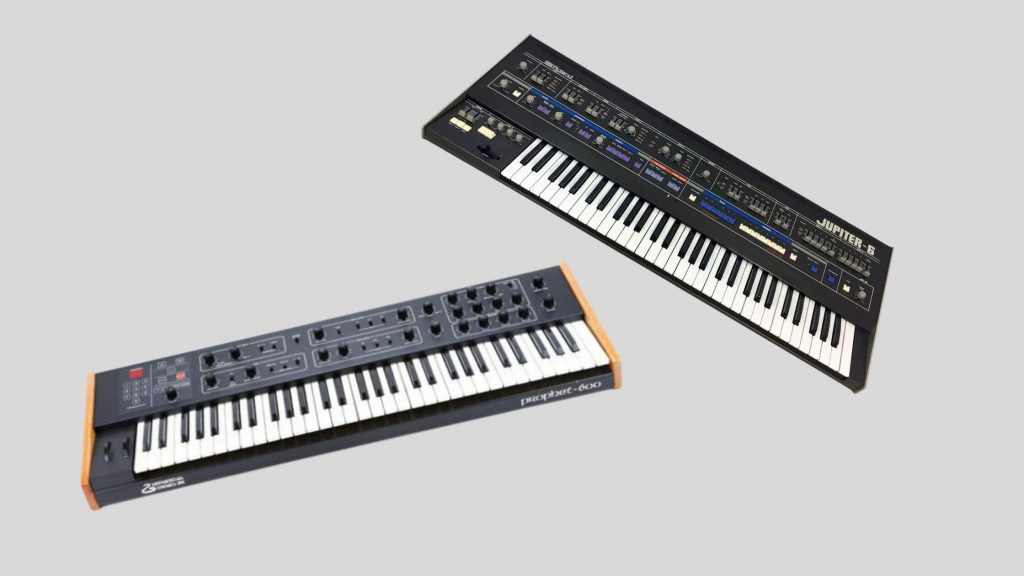
Computer
The first thing you’ll need is a computer. You don’t need a computer with all of the bells and whistles. A cheap desktop or laptop will be able to handle recording, mixing, and mastering in DAW software. But there are three things that you should keep your eyes peeled for as the more you have of them the better your PC will be able to handle DAW music production processing.
A cheap desktop or laptop will be able to handle recording, mixing, and mastering in DAW software.
CPU
The higher CPU you have in your PC will allow your computer to handle more simultaneous processes running at one time. For example, recording with multiple tracks and having multiple plugins running at the same time. A decent quad-core CPU will get you through this heavy processing with minimal issues.
RAM
The amount of RAM your PC has is the most limiting factor on the number of tracks and plugins you can run simultaneously. The vast majority of music software is 64-bit software, and 64-bit software allows your PC to get as much as it can from your RAM. 8 GB of RAM is the minimum your PC needs for recording, arranging, mixing, etc. But 16 GB or more is always better. If your PC is running slow, the best computer speed-up tip you could be given is to speed up your RAM. Whether you’re using a Mac or PC, more RAM means will allow your computer to run much smoother.
Storage
Finally, we have the hard drive. To put it simply, if you have more hard drive capacity then you can record for longer. Record to an internal hard drive is far safer than recording to an external one as internal drives read and write data much quicker than external ones. Using an external drive may lead to your DAW crashing or worse. Nobody wants that, do they?
Read more about laptops for making music:
Top 5 Best Laptops for Making Epic Music
DAW
Now you need some software to actually make some music. Now that you’ve got your computer, you should start thinking about what Digital Audio Workstation/DAW you would like to use. If you’re a Mac user, Garageband is free and is already on your computer. It’s not the most versatile DAW but it’s a starting point. There are also free DAWS for PC too, such as Ardour and Podium Free. These free DAWs have all of the features that you need to get started, just like Garageband. If you want to jump straight into making music on a fully fleshed DAW, most of them have a free trial period.
A DAW, in short, houses all of the tools you need to make music. From volume and gain, to pitch alterations, and a plethora of other stuff. Anytime you download or buy plugins (more on that later) you’ll use them in your DAW.
If you’ve been paying attention to music talk, you’ve probably heard names like Ableton, Cubase, Logic Pro X, FL Studio, and more thrown around. Some have a more loop-based approach, some are better for making beats, and some are better for recording. We’re not going to recommend one over the other. But we do recommend looking for reviews on YouTube and deciding for yourself which one sounds good to you. Don’t forget to make use of their free trials!
Read more About Digital Audio Workstations:
Our Top 5 Free DAWs That Remove Barrier to Entry to Music Creation and Then Some
Audio Interface
Whether you’re on a Mac or a Windows PC, audio interfaces serve the same purpose. Audio interfaces convert electrical microphone and instrument signals into data that your computer can read. Audio interfaces also route signals through a headphone jack so you can listen to your signal without the use of studio monitors.
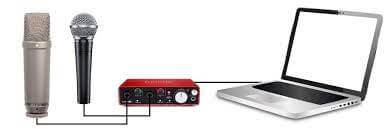
A microphone converts the analog signal of your vocals or guitar strumming into an electrical one. This signal then travels through the mic cable to your audio interface which converts the signal into a digital (binary) one that your computer can read.
When the audio is then inside your DAW, a universe of editing tools is open to you.
As the name suggests, audio is the thing that audio interfaces serve. It’s their only mission in life. This makes them soundcards, and you don’t actually need a soundcard in your computer if you have an audio interface.
Read more about audio interfaces:
How Audio Interfaces Work and Why You Need One to Record Digital Music
How to Choose an Affordable Audio Interface
Top 5 Audio Interfaces for Beginners
Headphones
Next up, we need to talk about how you’re going to listen to the music you make. If you’re in your bedroom or any other untreated room, we recommend using headphones over speakers/studio monitors. This is because the sound will bounce off of your walls and what you hear won’t actually be a true reflection of what you’ve made. But with headphones, it’s a different story.
Are you going to use your studio headphones for both monitoring and mixing, or do you want a pair of studio headphones that are dedicated to mixing? If you’re just starting out then you’ll want to look for a pair of studio headphones that perform well at all three functions, of course.
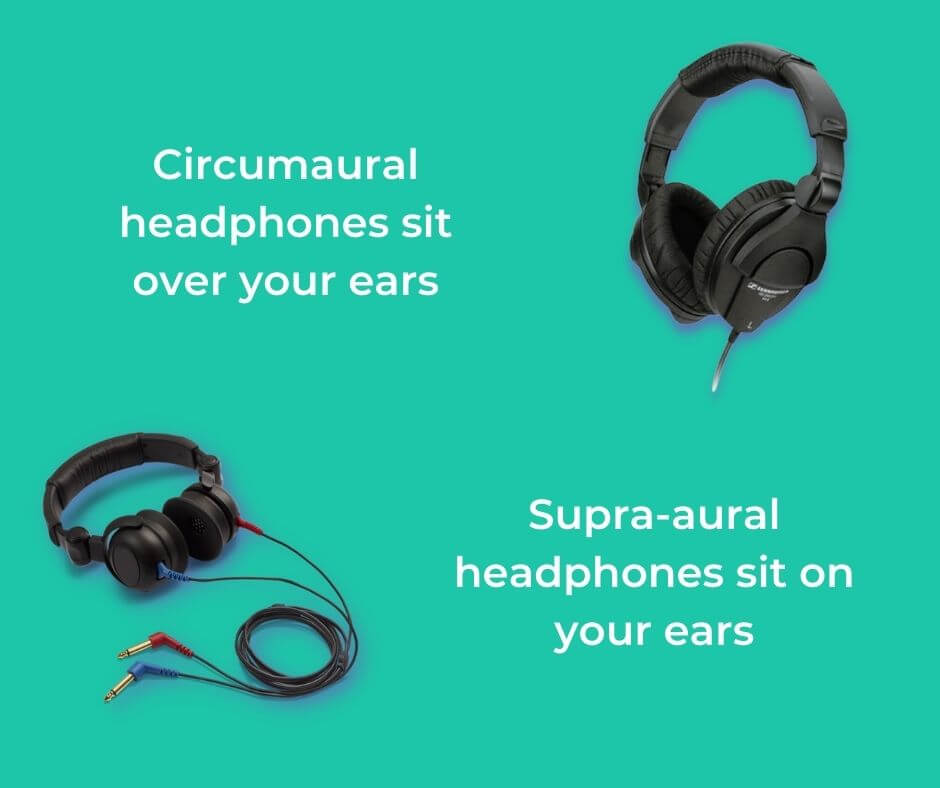
There are three types of studio headphones when it comes to music production. Those are open back, closed back, and semi-open.
Open-back headphones have the outside of the ear cuff completely open. This serves the purpose of releasing sound pressure that’s generated inside the headphone cuff. Open-back headphones excel at mixing. By releasing sound pressure into the world, there is no build-up of reflected sound inside the cuff – providing a more accurate sound.
Closed-back headphones are the polar opposite of open-back if you hadn’t guessed. The ear cuff is completely closed, meaning no sound escapes them. Closed-back headphones are great for monitoring purposes, so much so that vocalists use them to monitor their vocals in a booth. Due to their closed nature, they’re better at noise canceling than open-back headphones. But due to the build-up of reflected sound within the ear cuffs, they’re not so good for mixing purposes.
Semi-open headphones are the best of both. They’re great for both mixing and monitoring, so home studio producers may find these to be their best shot. Partially open from the back, semi-open headphones allow us to record vocals and mix our track down all without taking the headphones off our heads.
Read more about studio headphones:
How to Choose Studio Headphones
Top 5 Headphones for the Studio on a Budget
Studio Monitors
When it comes to studio monitors, it’s important that you don’t break the bank as it’s so easily done. Whatever your balance is, divide it by two and then spend no more than that on your studio monitors. If you need to keep saving, then keep saving. You do have headphones, after all.
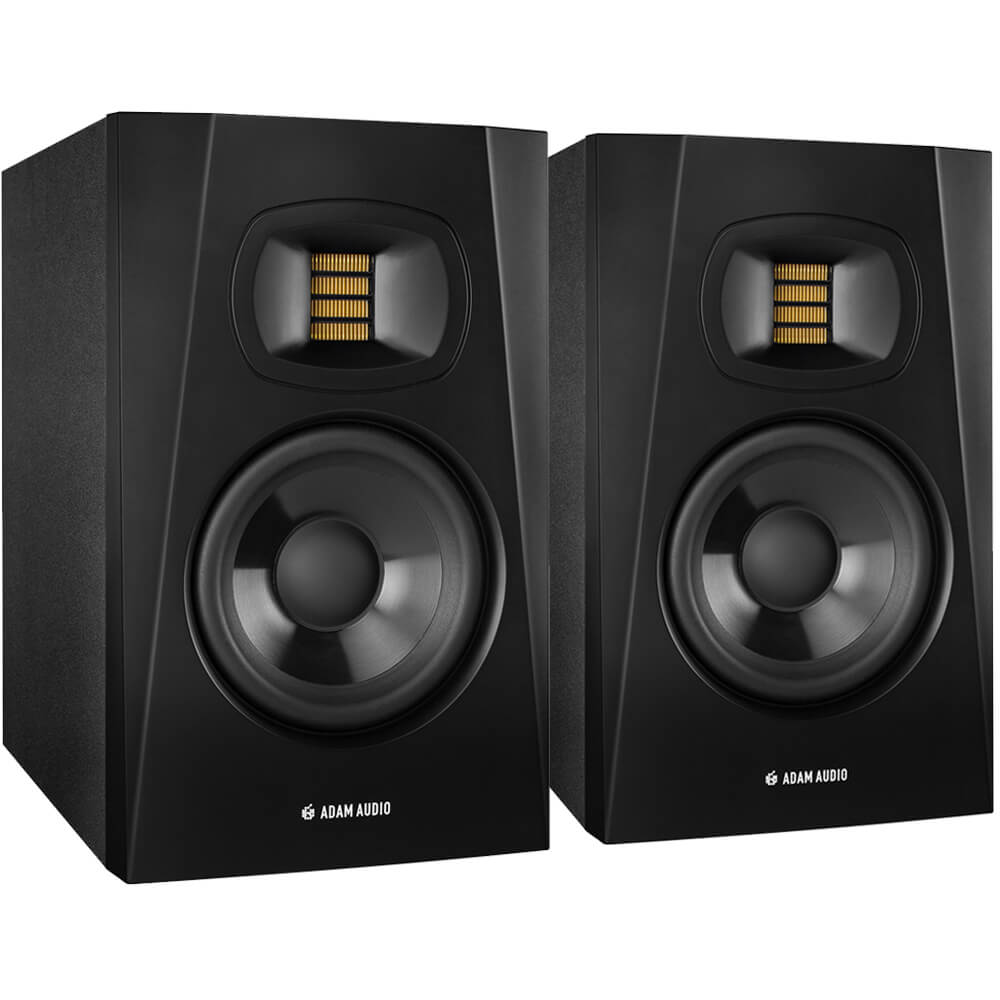
As we said, prioritize using great headphones over studio monitors because your room will add reflections to the sound that you hear. This may sound like no big deal, but it is. This has a heavy effect on the decisions you make in your DAW because what you think you hear may sound good when, in fact, your room has added to the sound that you’re hearing.
But, if you want to go ahead and get monitors anyway or you want to get some acoustic treatment, let’s carry on.
If you’re looking for some new studio monitors: Top 5 Affordable Studio Monitors for Epic Sound
MIDI Controllers
MIDI, in short, is binary (1s & 0s) data that represents musical parameters.
These parameters include pitch, tempo, and other dynamics. Tools at your disposal generally vary from controller to controller.
MIDI converts musical notes into digital data that can be read and processed by your computer and other hardware.
Instead of using a mouse and keyboard to find, click and enter commands as well as piano roll notes, a MIDI controller enables you to operate in your DAW with buttons, faders, and knobs.
Read more about MIDI:
Top 5 Affordable MIDI Keyboards
Useful Tips for Setting Up Your Home Studio
With all of the equipment necessary for making music out of the way, let’s take a closer look at your potential home studio, shall we?
If you’re looking to build a home studio: How Much Does A Home Studio Cost?
Studio Monitor Placement
Your head should form an equilateral triangle with your monitors every time.
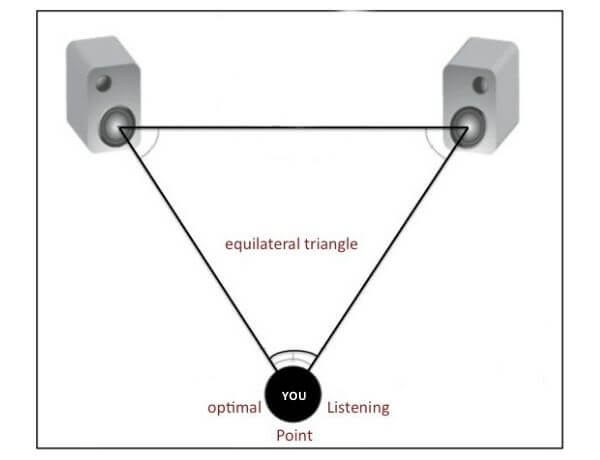
Above, you can see that your head should be the finishing touch to an equilateral triangle. An equilateral triangle features three sides that are all of the same length. To keep things simple, a good rule of thumb may be to have your monitors five feet apart from one another and ensure you have 5 feet between you and both monitors.
The reason for this simple step is to ensure an industry standard. If there was no standard, stereo images would vary massively between different studios.
Read the full guide: Where Should You Place Your Speakers?
Acoustic Treatment
Acoustic treatment isn’t necessary if you’re making music with headphones. If you want to use studio monitors, we recommend undergoing the clap test in your room. The clap test will tell you where in your room some acoustic treatment is needed.
Clap at every point in your room. You may hear some metallic fluttering from wall to wall, or you may hear some light reverb after you clap.
The mad fluttering is called flutter echo, and it has no place in a studio. If you find that you only get some slight reverb then that’s workable. But that doesn’t mean your studio couldn’t do with a touch of acoustic treatment.
For the full guide to acoustic treatment, check out the full articles on acoustic treatment and setting it up.
How to Set Up Acoustic Treatment
How to Set Up Bass Traps
The most important factor in any acoustic treatment setup is, yes, their setup. The end result depends on the positioning of each panel.
The starting point for bass traps should be the corners of your room, demonstrated by the red dots in the image below.
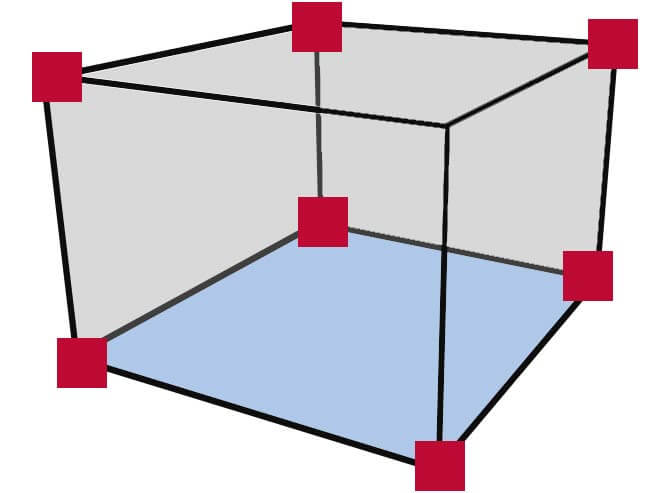
These red dots represent trihedral corners. These always get first priority because the parallel walls always converge with one another at these points. There are three points of contact.
Next up, you’ve got your dihedral corners. These are the black lines in the image. You can see that dihedral corners are always the meeting point of two walls.
With this in mind in terms of placement, where, in your room, is there a meeting point of three walls (i.e, corners), and where is there a meeting point of two walls?
Step 1
Place a bass trap in each trihedral corner of your room. If you only have four traps, place them in the upper corners. If you have eight, place them in the lower ones too!
If you have or will have more, begin placing them between the upper and low traps in each corner.
Step 2
Now that you have the trihedral corners all sorted, it’s time to work on your upper dihedral corners!

How to Set Up Acoustic Panels
Now that you’ve filled each of these corners with bass traps, your low end is as dry as you’re going to get it. Your high end should be sounding much drier too!
Now, let’s move on to panels to really tidy up that high-end reflected sound…
You’ve mounted your bass traps and your panels are in the box ready to go. Two basic steps you can take before worrying about the whole room are:
The first place to stick panels is directly behind your studio monitors.
If you have any empty spaces on your dihedral corners, use some panels to fill them!
To know just how much wall you need to cover with acoustic panels, you should continue doing the clap test. As you’ve filled the room with bass traps and some panels, it’ll sound a lot drier. The only way to truly know where panels will be most effective is to keep clapping!
A handy trick to know when you’re on a budget is to keep one area of a wall empty if you have a set of panels directly opposite. Panels on one wall are enough to kill standing waves in that area.
The Main Plugins and Effects You’ll Use
Okay, so now that we have discussed all of the things you need (excluding acoustic treatment) it’s time to briefly talk about the software (plugins) that bring music to life.
Synthesizers and VSTs
VSTs are what we use to make a sound. VST stands for Virtual Studio Technology.
Before digital took over, everything was analog. Sounds were made on hardware units called synthesizers. But many synths were often limited in their capabilities. They made great sounds, but the possibilities of today from that of yesterday.
There are many different types of synths and each has its place. We’ve written about all of them extensively, and you can click the link below to journey through the whole world of synthesis.
VSTs are made by music software companies such as Xfer and Native Instruments. I have no doubt you’ve heard of Xfer’S Serum & Native Instruments’ Massive? These are both wavetable synth engines, and each synth type differs from others because of just how it can be sued to make sounds.
Wavetable synthesis is different from the likes of subtractive synthesis where different you chisel and filter a sound wave down to create new waveshapes. It’s different from additive synthesis where you bring different soundwaves together to create a new sound. It differs from FM synthesis where different operators modulate and are modulated together in different patterns/algorithms to create complex timbres and additional sidebands.
If you’re confused by anything in that paragraph, we recommend you take a journey through synthesis.
Read more about sound design:
We recommend starting with the article we’ve linked here and make your way down the list in the same article. There is a lot of information here, so take it in chunks. To have a sound understanding of most synthesizers you’ll see a lot of you only need to read the first five articles.
If you’re feeling adventurous, we recommend looking into granular synthesis too!
EQ
An EQ is merely a tool that allows us to define and affect specific frequency bands. An equalizer can emphasize or cut specific frequencies with either linear or non-linear signal processing.
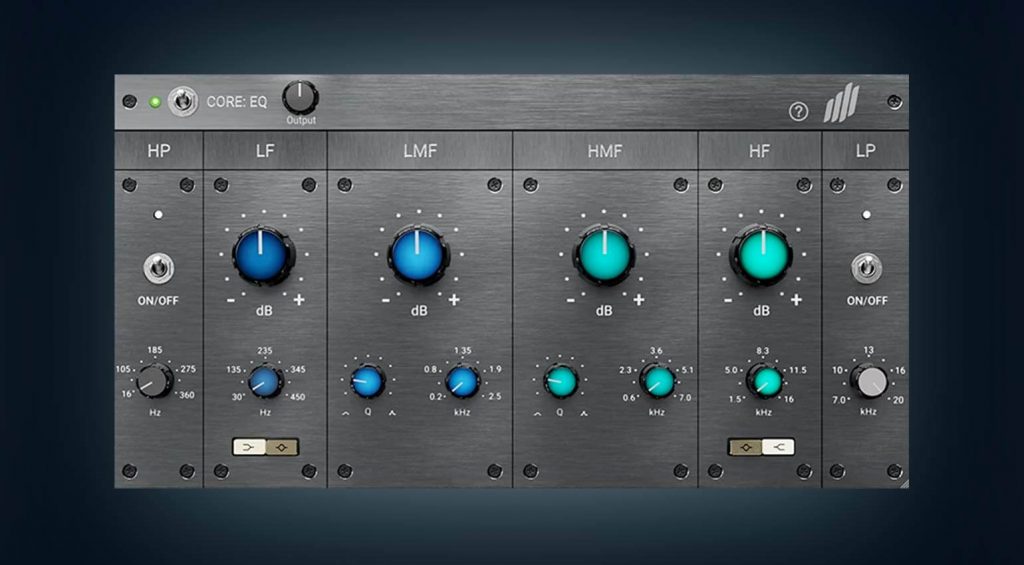
Most EQs use linear processing. This means that the signal leaving the EQ won’t change unless you apply a change in the EQ yourself. If you boost your mid frequencies between 1.2kHz and 2.4kHz, the signal leaving the EQ will sound boosted in these ranges.
Others, such as dynamic EQs, use non-linear processing. Non-linear processing means the EQ can apply changes to the signal based on instructions you’ve set. Dynamic EQs allow you to make the frequency bands/filters react to the incoming signal on their own but based on settings you’ve set with controls you’d find on a compressor like a ratio control, threshold, attack, and release, etc.
Read more about EQ’s:
Understanding the Frequency Spectrum to Mix Your Tracks like a Professional
What is an EQ? Why Do We Use Them in Music Production?
Different Types of EQ’s and Their Uses
How to Use Your EQ to Emulate Psychoacoustics and Create Width and Depth in Your Mix
Our Favourite Three Methods of EQ’ing A Kick and Bass to Work Together in the Your Mix
Compression
There are multiple uses of compression, but we’re going to talk about two of the most common ones here.
The most common way to use compression is compression which reduces the dynamic range of your audio signal to keep a consistent level.
This is an important process in music production. Input gain can differ massively in recording audio, so compression allows us to round off the peaks and bring the quiet and loud points closer to one another. If a particular signal is your lead and the gain levels are all over the place, compression is your go-to.
De-Essing is the process of reducing sibilance (S’s & T’s) and harshness in your vocal signals. Dynamic EQs, multi-band/sidechain compressors, or dedicating de-esser plugins can help you achieve this.
De-essing reduces the harshness of hissy sounds by lowering the sibilant frequencies (usually by 5kHz to 8Khz) more than the frequency bands that aren’t harsh.
Read more about compressors:
What are the Different Types of Compressors?
Reverb
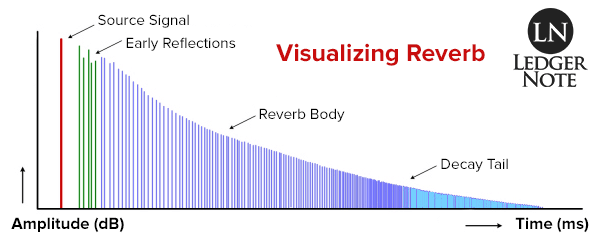
Reverb is thousands of repetitions of a sound occurring so quickly that you only hear them as a smear of sound based on the original source. Reverb can last as long as 0.1 seconds or as long as 10 seconds!
In the image above, you can see a breakdown of the life cycle of reverb by LedgerNote.
The main elements of reverb that you control are:
Early reflections (1 to 30 milliseconds)
Body (30 to forever if you chose)
Decay (tail of reverb as it drops below about 60dB)
The other elements you can control are the size, shape, and material of the virtual room!
Back in the day, the only way to use reverb was to record it.
By placing microphones in the right places to record the natural sound of the room like a hall, room, or basement, you had to manually “create” the reverb effect that we today use a piece of software for.
Read more about reverb:
How to Use Reverb: A Beginners Guide
Delay
Delay is a time-based effect where audio is fed into the delay unit or plugin and played back multiple times at a rate set by you, the engineer.
With reverb, the signal is repeated many times in less than 50ms and that’s why we hear it as one mush of the sound. If the sound source was repeated at a slower rate than 50ms, we would hear it as an echo. And that, my friend, would be a delay effect.
Like reverb, delay creates a sense of depth in our music. We can also use it to add further tones, in a dissimilar way to distortion, and it’s widely used in many popular genres and electronic music.
Read more about delay:
How to Use Delay: A Beginners Guide
Distortion
Distortion adds additional harmonics/overtones that are mathematically higher than the fundamental frequency of the note played. All types of creative distortions fit into two neat categories: even harmonics and odd harmonics.
If you have an even distortion, such as a tube distortion, the added harmonics will be even multiples of the frequency played.
For example, if the frequency of your note was 523.25 Hz (C 5), the added harmonics would be at 1046.50 Hz, 1569.75 Hz, etc.
For a simpler explanation, if your fundamental was at 500 Hz, then added harmonics would be at 1000 HZ, 1500 Hz, etc.
However, if you had an odd harmonic distortion, like a Phase Distortion, harmonics would be louder at the odd intervals.
Therefore, with your frequency of 523.25 Hz, the accentuated harmonics would be at 1569.75 Hz, 2616.25 Hz, 3662.75 Hz, etc.
An easy way to break down how these intervals work is with the following formulas:
Even distortion: 1 (fundamental frequency), adds harmonic overtones at 2, 4, 6, 8, 10 (even intervals).
Odd distortion: 1 (fundamental frequency), adds harmonic overtones at 3, 5, 7, 9, 11 (odd intervals).
Read more about distortion:
Top 5 Ways Distortion Can Heat Up Your Music
To make music you need sounds. Though there are places where you can get free sounds, these are often poorly made or not legal to use in your music. But, thankfully, there is a place where you can get quality sounds that are DAW-ready.
The sampling revolution has risen in popularity and shaped music since the early 1970s. Sample culture continues to transform how millions of artists and producers do their thing in DAWs.
You too can break conventional norms, challenge the status quo, and open Pandora’s box of sound design.
Mixxed works with a growing number of sample labels and contributors to provide you with an affordable sample subscription service that’s more accessible than any before.
You’ll have access to our growing catalogue of loops, one-shots and sound effects that you can browse, download and keep forever for less than $3 a month.
Sign up today to find your sound!