How to Make Music From Samples and Get Creative With Your Sounds
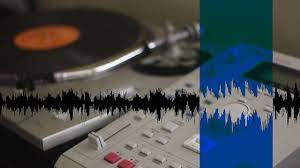
Sample-based music production is on the upward trend and has been for a while now. Sampling entails taking single or multiple snippets (samples) from a piece of music, or any sound source like a washing machine or birds, and manipulating them.
This process allows us to take whole sounds and turn them into something completely different, and use them as a unique instrument.
How to Start Sampling Music and Everything Else
The first step is to choose what you want to sample. It can be a song, someone talking, or a sound that you enjoy every day – like birds tweeting. Unless you’re in a city, then you could sample a car horn or general traffic. in its natural habitat. The world really is your oyster here.
To make the most of the sampling opportunities in front of you, you want an audio file with as much quality as possible. To achieve this, we recommend file types such as WAV or AIFF file types. THese are PCM (pulse code modulation) file types that don’t cut any audio information from the file like lossy file types such as MP3’s.
Whether you recorded your sample with a microphone or imported an audio file straight into your DAW, cut out short clips of the file. Choose your favourite parts and cut them out from the original file. Now is where the fun begins.
If you’re looking to make a percussive sound out of your synth, a stabby section of the sample with prominent transient information will be your best bet. If you’re looking to make something rhythmic or groovy, find a section with propulsive rhythm when looped on itself.
Okay, so now you’ve got your samples… would you like to know how to manipulate them and make them unique?

Creative Ways of Manipulating Your Samples
Pitching
First up, let’s play with the pitch of your samples.
If you stick with the original pitch of your samples, your sample(s) could end up quite bland compared to what they could sound like. Sometimes, of course, the original pitch is perfect and could be the reason you sample a particular sound in the first place.
But, with that said, transposing your samples often makes a big difference to the sound and opens the flood gates to new realms of sonic opportunities. We can manipulate the pitch of both one-shots and loops and create completely new tones and timbres, whilst not removing any transient information.
To make the most of transposing your samples, get them in key with your song as and when you insert them into one. Once upon a time, sampling techniques caused unwanted speed changes to the sample when altering the pitch. Tools in the digital sphere, however, allow us to keep the tempo of the sample the same.
One example of this tool is the “Warp” button in Ableton’s sampler. You can edit the transposition of the same as much as you like and the speed of the sample won’t change! If you’re not an Ableton user, have a look online as to how your DAW keeps the speed of a sample the same while editing the pitch of the sound.
Slicing/Cutting
We originally cut our samples out of our original file, but we can slice them further!
Slicing allows us to further modify the sounds in front of us. As we said in the previous section, if we cut our samples based on where transient information is prominent, we can create whole new drum samples out of a rhythmic loop!
Slicing also allows us to reimagine our samples’ particular melody/rhythm. We can re-order any sort of progression that our samples follow and, and we can get as unconventional as we like.
Stretching/Warping
We’ve got cool pitches on the go, as well as new melody lines and some serious drum potential. Naturally, stretching is our next process.
Stretching allow us to create interesting rhythms and timbres. We can stretch samples for the sake of experimentation, or we can stretch them to fit in with the timing of our track. The latter opens up more opportunities for manipulating our sample libraries in a more direct way, compared to just experimenting – which is equally as fun of course.
Plugins such as PaulStretch allow us to sample stretching up a notch, however, because PaulStretch allows us t stretch our samples up to 800%! The soundscapes we can create with tools such and Paulstrecth are fascinating, and we can use these new sounds to continue the sampling process!
Simply cut the soundscape up and repeat the processes we’ve discussed above!
Filtering and Automation
Finally, it’s time to tidy things up before we bring in any sort of processing.
Using automation to manipulate volume, pitch or any processing allows us to bring some character to our samples that blend them into our song.
If you’ve created a kick drum out of one of your transient sample cuts, you can automate the volume fader to shape the kick. Or you can bring in a low pass filter to remove some unneeded high end. Or both!
You could use automation to bring in some reverb or delay, some extreme bit crush.
Whatever you do, you can resample your finished sound! When you’re happy with the sound, don’t be afraid to import it to your DAW at any time and repeat this cycle!
The sampling revolution has risen in popularity and shaped music since the early 1970s. Sample culture continues to transform how millions of artists and producers do their thing in DAWs.
You too can break conventional norms, challenge the status quo, and open Pandora’s box of sound design.
Mixxed works with a growing number of sample labels and contributors to provide you with a premium sample subscription service that’s more accessible than any before.
You’ll have access to our growing catalogue of loops, one-shots and sound effects that you can browse, download and keep forever for less than $3 a month.
Sign up today to find your sound!
