
What plugins do I need for mastering?
Mastering, the final step in the music production process, is a critical stage that ensures your music sounds polished, professional and ready for distribution. Utilizing VST plugins can significantly enhance the mastering chain, allowing you to fine-tune and perfect your tracks. Here’s a comprehensive list of essential plugin types that can elevate your mastering process to new heights:
Equalizer (EQ)
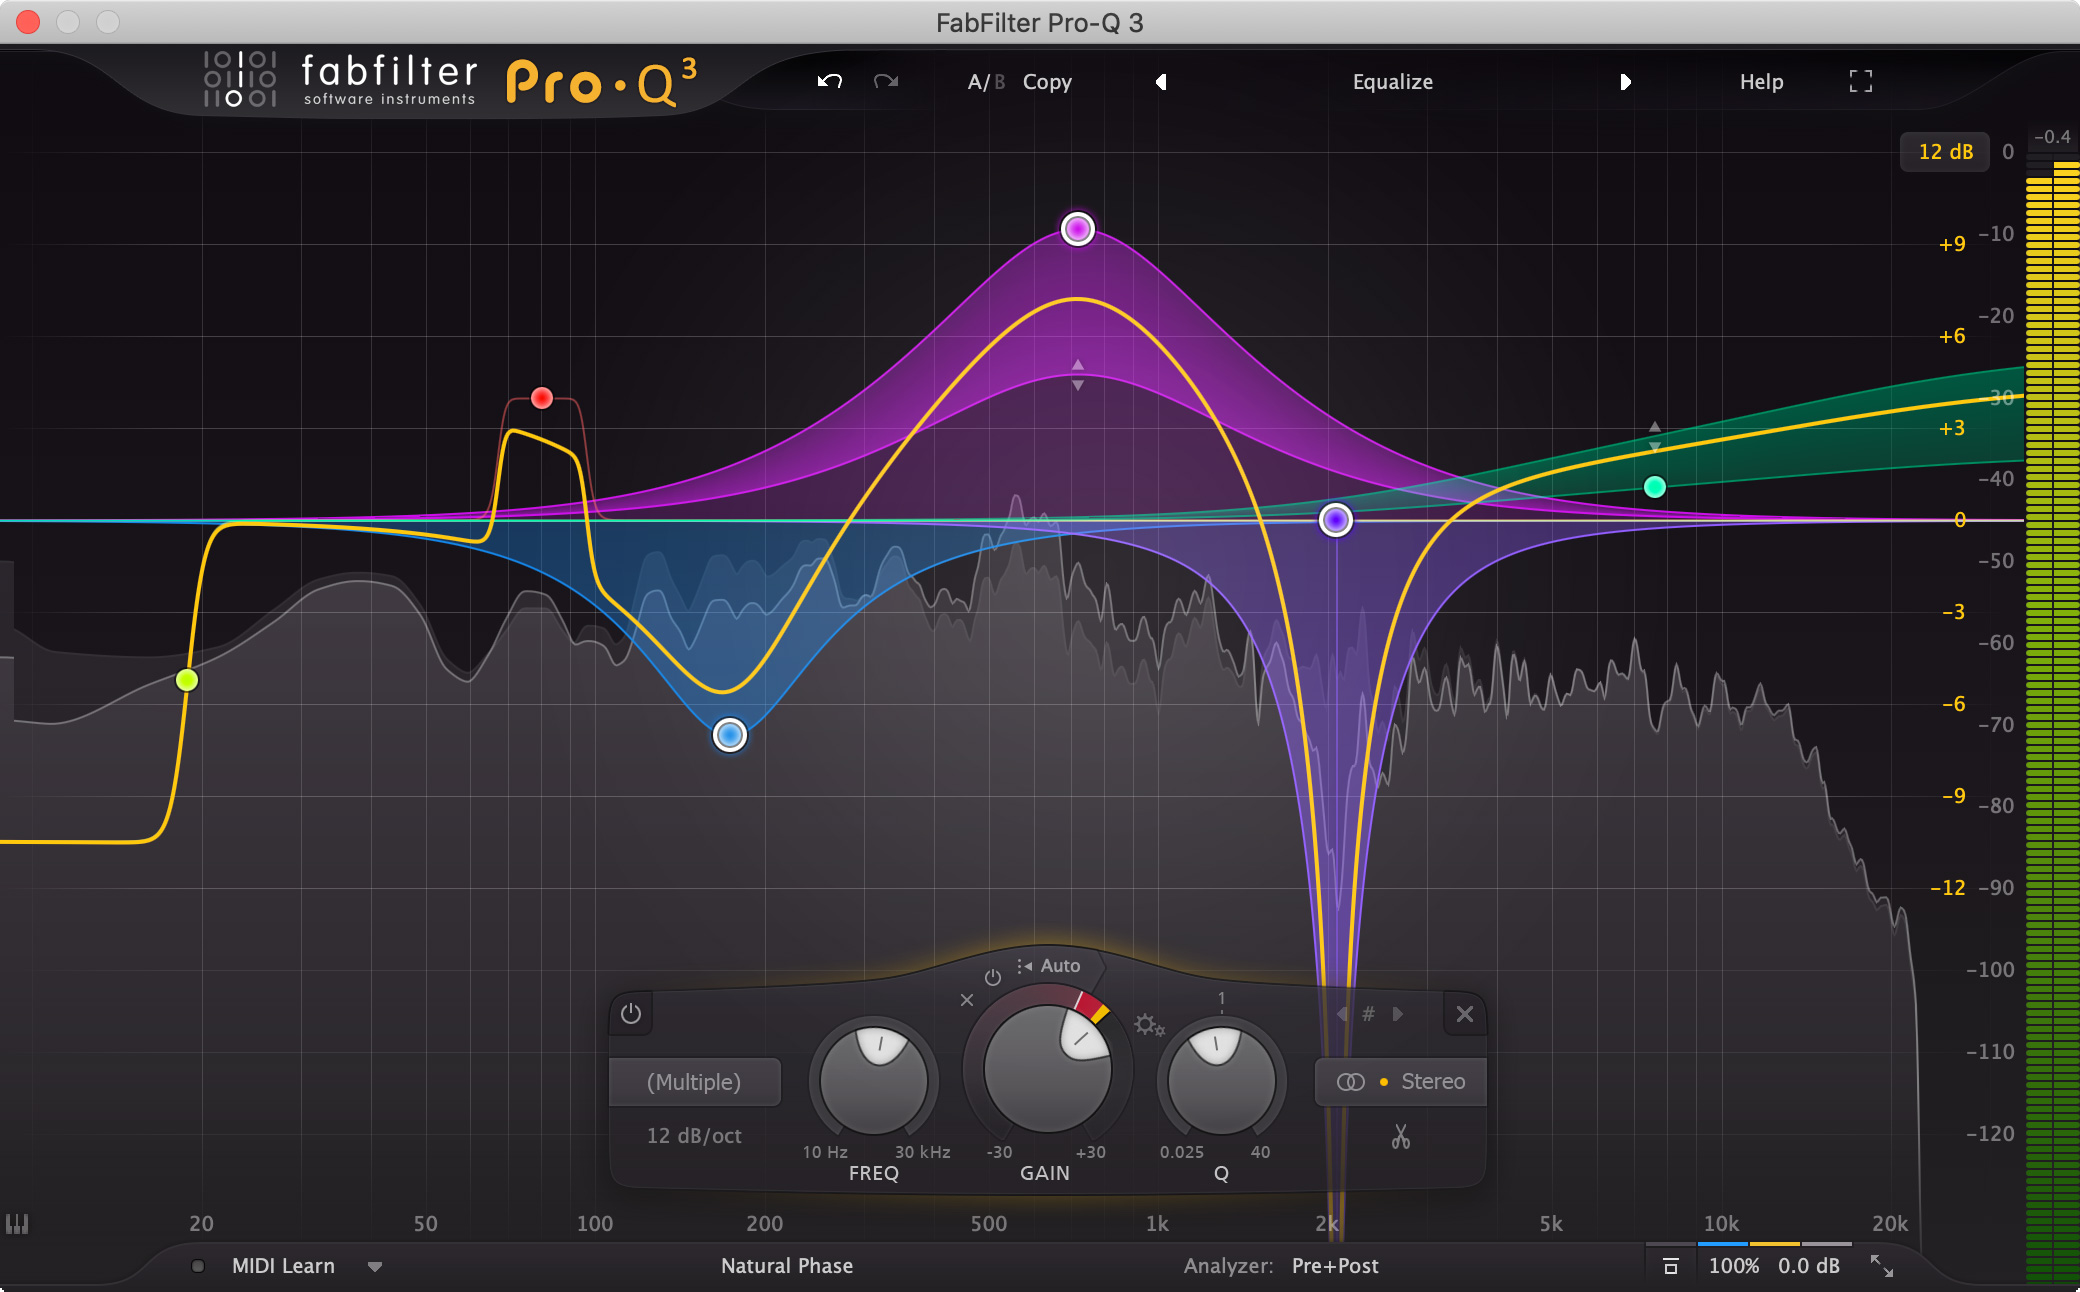
Using an EQ (Equalizer) in the mastering process is a crucial step to ensure that the frequency balance of the final mix is optimized and polished. Here’s a guide on how to effectively utilize an EQ during mastering:
- Identify frequency imbalances: Listen to the overall mix and identify any frequency imbalances or problem areas. Pay attention to muddiness in the low end, harshness in the midrange, or excessive brightness in the high frequencies.
- Apply broad corrections: Make broad corrections first by using high and low-pass filters to cut out unnecessary frequencies that don’t contribute to the overall mix. This can help clean up the mix and create more headroom.
- Address resonant frequencies: Identify any resonant frequencies that may be causing specific instruments or elements to stand out unnaturally. Use a narrow bandwidth to attenuate these frequencies subtly.
- Enhance or attenuate specific frequencies: Boost or cut specific frequencies to enhance or attenuate certain elements within the mix. Be subtle and make slight adjustments to maintain the overall balance while emphasizing the essential elements of the track.
- Consider linear phase EQ: In cases where precise adjustments are necessary, consider using a linear phase EQ to make transparent and precise changes without introducing phase distortion, particularly when dealing with delicate mixes.
- A/B Testing and critical listening: Continuously switch between the EQ’ed and non-EQ’ed versions of the mix. Practice critical listening to ensure that the adjustments are contributing positively to the overall tonal balance without introducing any unwanted artifacts or coloration.
- Maintain transparency: Aim to maintain the transparency and natural character of the mix while addressing any frequency issues. Avoid over-processing and excessive boosts or cuts that could potentially alter the intended sonic character of the music.
- Final touches and subtle enhancements: Make final touches and subtle enhancements to ensure that the mix sounds cohesive and balanced across all frequency ranges. Pay attention to the overall tonal balance and make any necessary adjustments to achieve a polished and professional sound.
Using an EQ in the mastering process requires a delicate balance between making necessary adjustments and preserving the integrity of the original mix. The goal is to achieve a balanced and refined sound that complements the artistic vision of the music.
Multiband Compressor
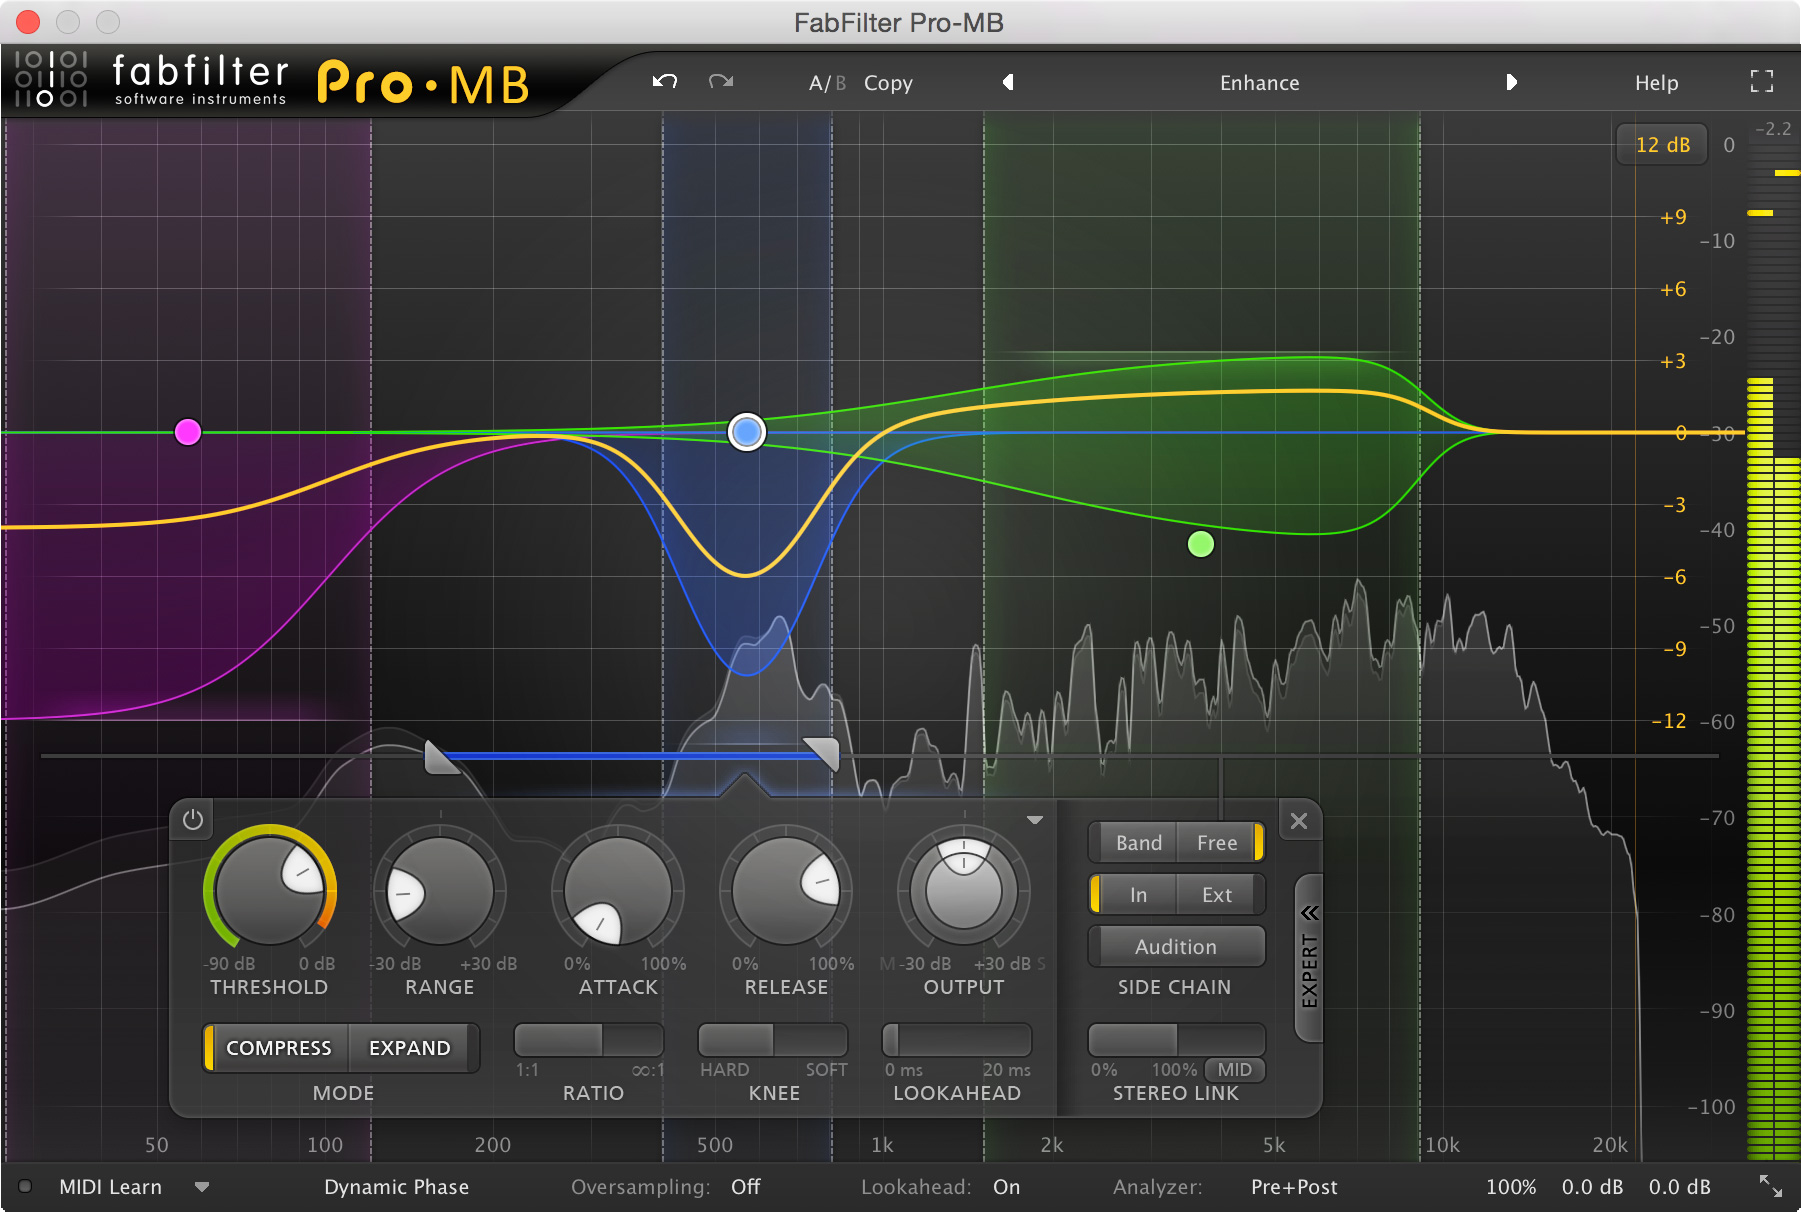
Utilizing a multiband compressor in the mastering process allows for precise control over the dynamics of different frequency bands, ensuring a polished and balanced final mix. Here’s a step-by-step guide on how to effectively use a multiband compressor during mastering:
- Identify frequency imbalances: Listen to the mix and identify any frequency-specific dynamic inconsistencies, such as excessive low-end rumble, harsh midrange transients, or overly bright high-frequency elements.
- Set crossover points: Divide the audio spectrum into different frequency bands by setting appropriate crossover points for the low, mid, and high frequency ranges. Choose crossover points that align with the problem areas identified in the mix.
- Apply compression settings: Set the compression thresholds, ratios, attack, and release times for each frequency band. Adjust the parameters to gently tame any peaks or transients without squashing the overall mix. Ensure that the compression settings complement the musical dynamics and maintain the intended tonal balance.
- Balance the bands: Maintain a cohesive and balanced sound by adjusting the relative levels of each frequency band. Ensure that no individual band stands out prominently or feels disconnected from the rest of the mix.
- Use solo mode for precision: Use the solo mode feature to isolate each frequency band and make precise adjustments to the compression settings for each band. This allows you to focus on the specific dynamics within each frequency range and fine-tune the compression parameters accordingly.
- A/B Testing and critical listening: Continuously compare the compressed and uncompressed versions of the mix. Practice critical listening to ensure that the dynamic processing is enhancing the overall mix without introducing any artifacts or unwanted pumping effects.
- Maintain transparency and coherence: Aim to maintain the transparency and cohesiveness of the mix while using the multiband compressor to control dynamic inconsistencies. Avoid over-compression and excessive manipulation that could potentially alter the original tonal balance and musicality of the track.
Using a multiband compressor in the mastering process demands a nuanced understanding of the mix and a delicate touch to ensure that the dynamics are controlled without sacrificing the musicality and integrity of the original recording.
Limiter

In the mastering process, a limiter is a crucial tool for controlling the peak levels of a track, ensuring that it maintains a consistent and controlled volume without exceeding the desired threshold. Here’s a guide on how to effectively use a limiter during mastering:
- Set the threshold: Start by setting the threshold of the limiter to the desired maximum peak level. Choose a threshold that allows the track to retain its dynamics and energy while preventing any unwanted clipping or distortion.
- Adjust the ceiling: Set the output ceiling of the limiter slightly below the maximum digital ceiling to prevent any potential digital clipping. This ensures that the final output remains within the permissible limits without introducing any artifacts or distortion.
- Use the gain control: Use the gain control to make slight adjustments to the overall level of the track. Be cautious not to over-amplify the signal, as this can lead to excessive loudness and potential loss of dynamic range.
- Monitor the gain reduction: Keep an eye on the gain reduction meter to ensure that the limiter is effectively controlling any excessive peaks or transients. Make subtle adjustments to the release time and other parameters to achieve a transparent and natural-sounding attenuation of peaks.
- Use oversampling if necessary: Consider using oversampling if your limiter offers this feature. Oversampling can help reduce inter-sample peaks and improve the overall transparency of the limiting process, particularly when dealing with digital audio.
- A/B Testing and critical listening: Continuously compare the limited and unlimited versions of the mix. Practice critical listening to ensure that the limiter is effectively controlling the peaks without introducing any unwanted pumping artifacts or audible distortion.
- Maintain transient integrity: Aim to maintain the transient integrity and overall dynamics of the mix while using the limiter to control the peak levels. Avoid excessive limiting that could potentially squash the mix and reduce its perceived impact and energy.
Using a limiter in the mastering process requires a delicate balance between achieving a competitive loudness level and preserving the original dynamics and musicality of the track. The goal is to ensure that the final mix sounds polished, balanced, and consistent across different playback systems.
Stereo Widener
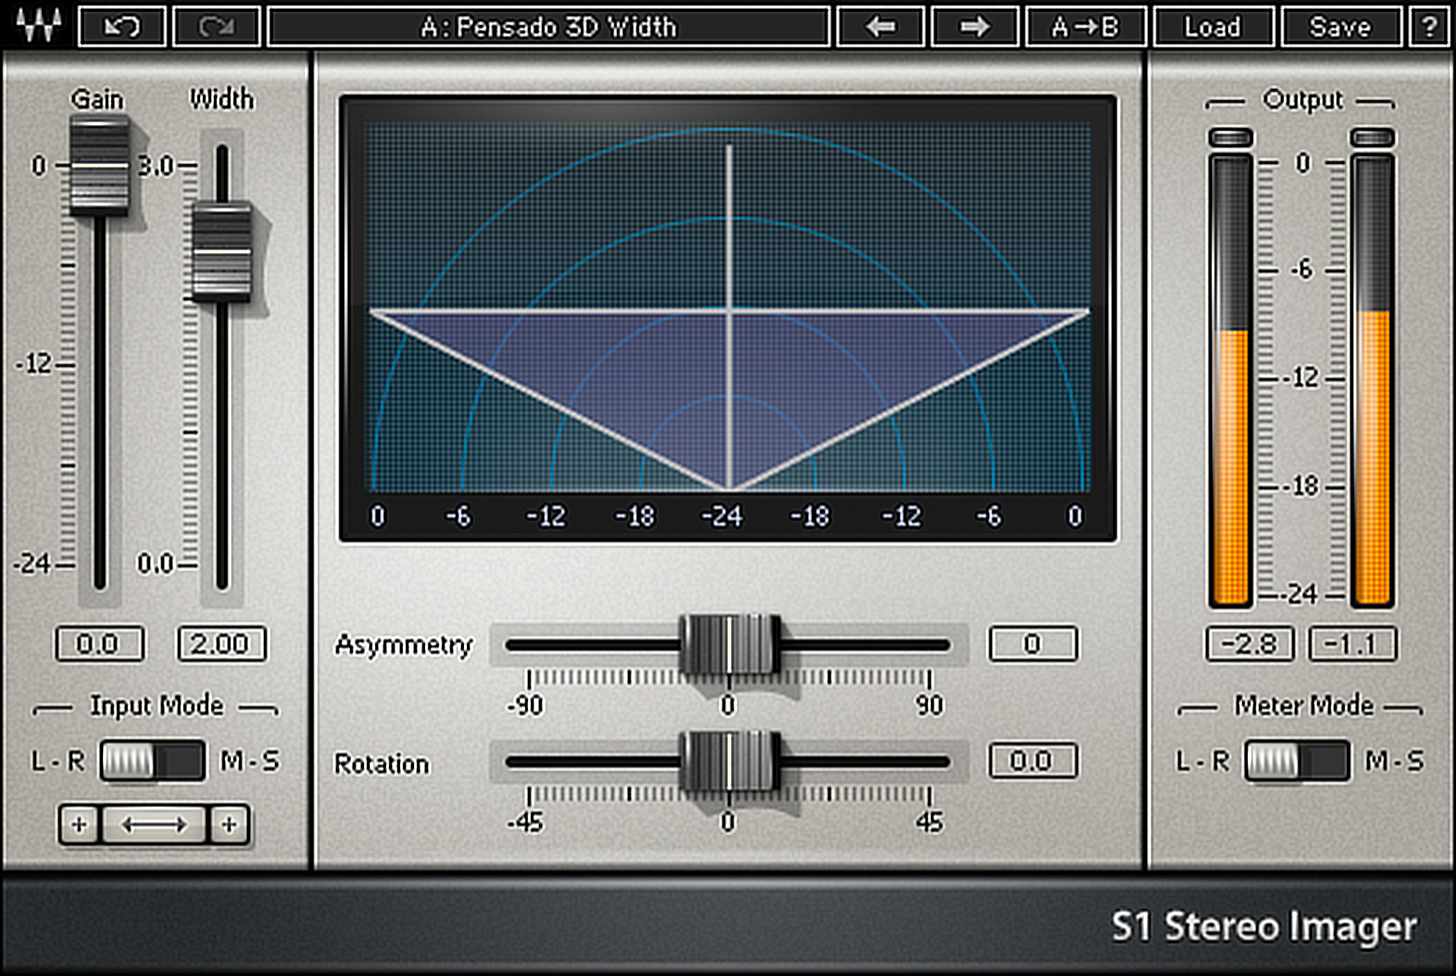
Using a stereo widener in the mastering process can add dimension and spaciousness to your mix, enhancing the stereo image without compromising mono compatibility. Here’s a guide on how to effectively use a stereo widener during mastering:
- Identify the elements to enhance: Determine which elements of your mix would benefit from a wider stereo image. Consider instruments such as synths, pads, background vocals, and certain percussive elements that could benefit from increased spatial presence.
- Apply subtle width enhancement: Apply the stereo widener subtly to avoid an excessively wide or unnatural sound. Make gentle adjustments to the stereo width, ensuring that the mix maintains its balance and coherence while providing an enhanced sense of space.
- Focus on mid and side signals: Some stereo wideners allow you to adjust the widening effect independently on the mid and side signals. Use this feature to control the perceived width while maintaining the solidity and focus of the center image.
- Avoid phase issues: Be mindful of potential phase issues that may arise when widening the stereo image. Ensure that the stereo enhancement does not introduce any phase cancellations or inconsistencies, particularly when the mix is collapsed to mono.
- Use in moderation: Apply the stereo widener in moderation to prevent listener fatigue and maintain a natural and cohesive sound. Avoid over-widening, which can lead to a loss of focus and clarity in the mix.
- A/B Testing and critical listening: Continuously switch between the widened and original versions of the mix. Practice critical listening to ensure that the stereo enhancement is contributing positively to the overall spatial depth and ambience without introducing any unnatural artifacts or phasing issues.
- Consider the target audience: Consider the playback systems and environments in which your audience is likely to listen to your music. Ensure that the stereo widening effect translates well across different playback systems, providing an immersive and engaging listening experience.
Using a stereo widener in the mastering process requires careful attention to detail and a nuanced understanding of the mix’s spatial characteristics. The goal is to create a sense of depth and immersion while maintaining a balanced and focused sound that translates well across various listening environments.
Exciter/Saturator
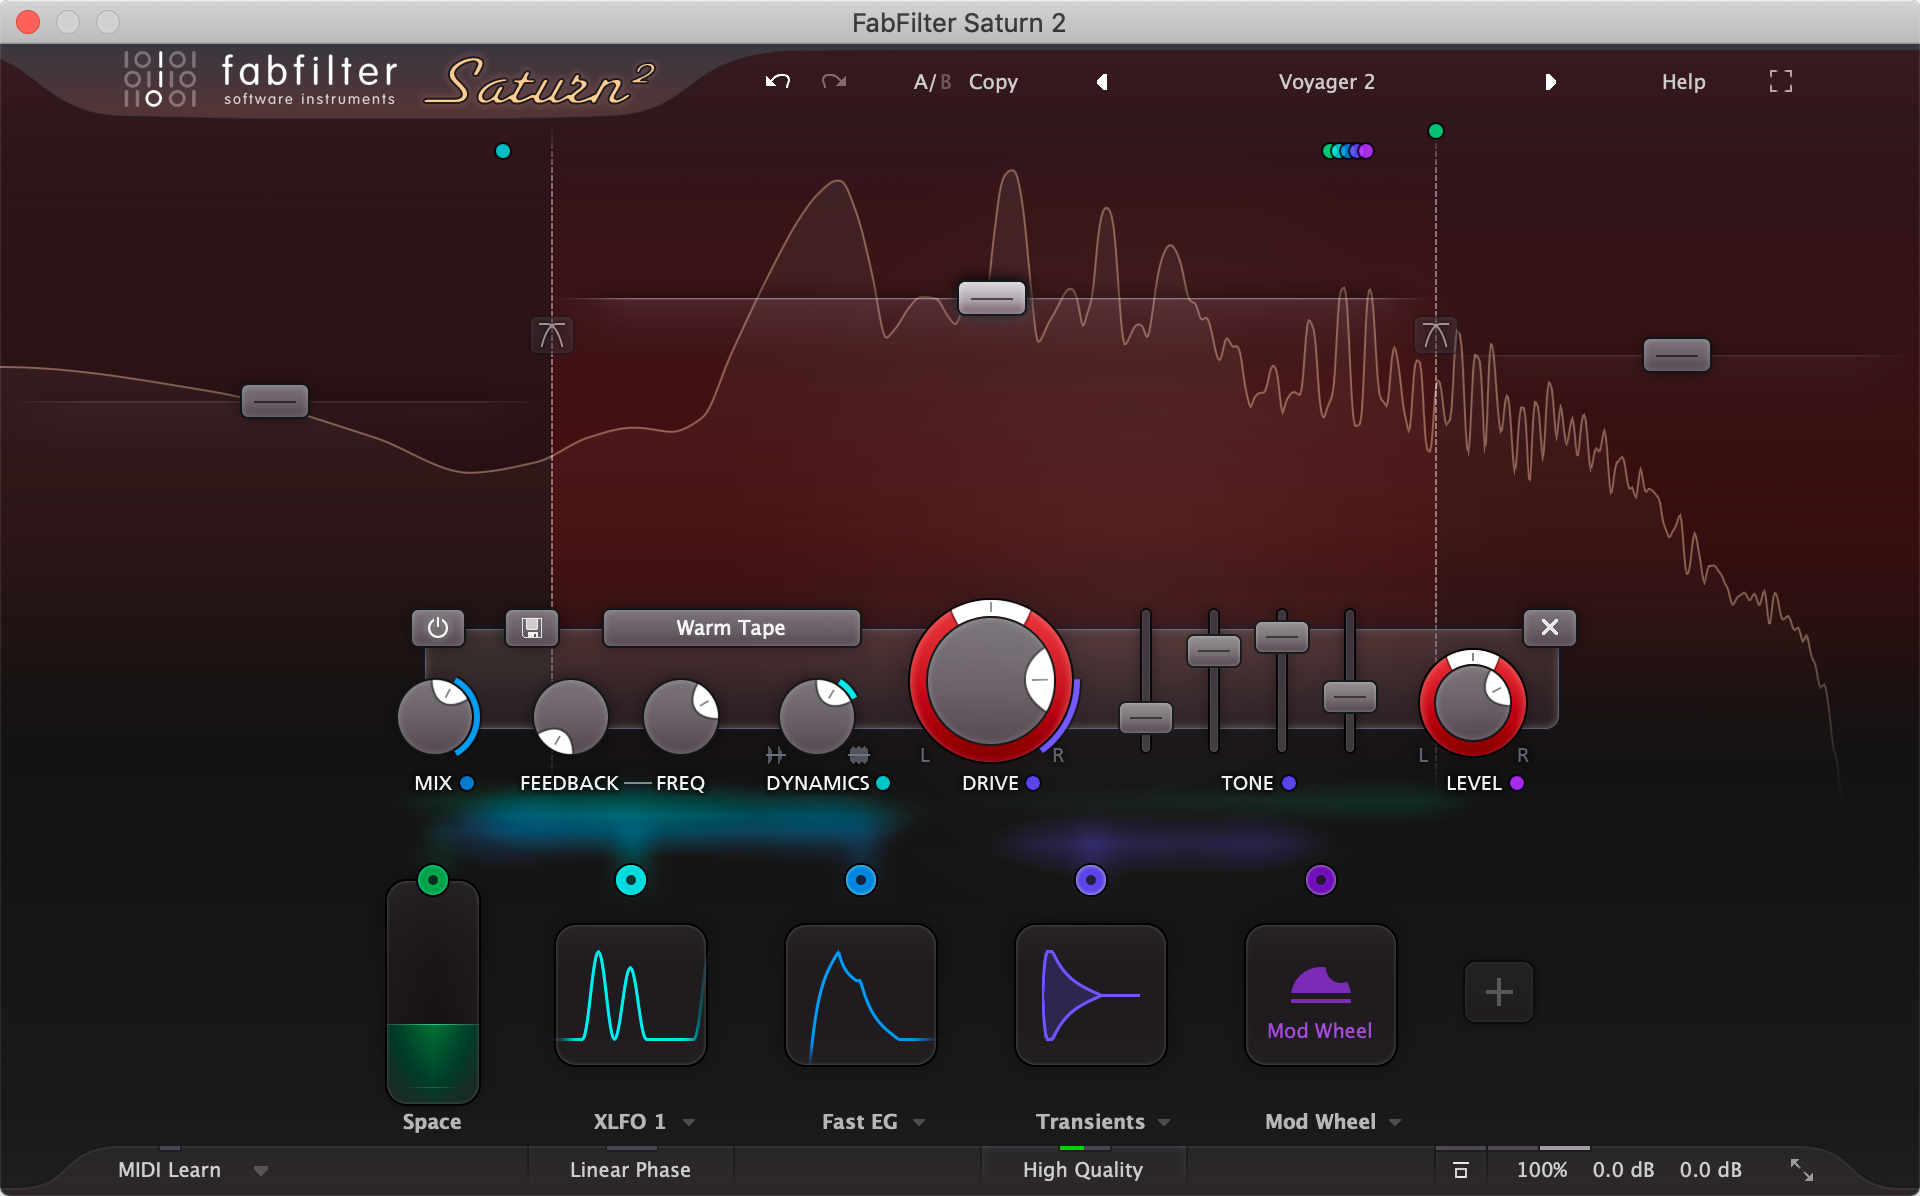
Using an exciter or saturator in the mastering process can add warmth, harmonics, and subtle distortion to your tracks, enhancing their overall richness and presence. Here’s a guide on how to effectively use an exciter or saturator during mastering:
- Identify elements for enhancement: Determine which elements of your mix would benefit from added harmonic content and warmth. Consider instruments or elements that could benefit from a richer and more vibrant sound, such as vocals, guitars, or synths.
- Apply subtle saturation: Apply the exciter or saturator subtly to avoid excessive distortion or coloration. Make gentle adjustments to the saturation level, ensuring that the mix retains its clarity and transparency while adding a touch of harmonic richness.
- Focus on specific frequency bands: Some exciters or saturators allow you to focus on specific frequency bands for saturation. Use this feature to target particular frequency ranges that may benefit from added warmth and harmonics without affecting the overall tonal balance.
- Avoid clipping and overdriving: Monitor the output levels to prevent any unwanted clipping or overdriving that could introduce harsh distortion or artifacts. Maintain a careful balance between achieving a rich, saturated sound and preserving the mix’s dynamic range and clarity.
- Use in moderation: Apply the exciter or saturator in moderation to maintain a natural and balanced sound. Avoid over-saturation, which can lead to listener fatigue and a loss of clarity and definition within the mix.
- A/B Testing and critical listening: Continuously switch between the saturated and original versions of the mix. Practice critical listening to ensure that the saturation is contributing positively to the overall warmth and character of the sound without introducing any unwanted muddiness or harshness.
- Consider the genre and style: Consider the genre and style of the music when applying saturation. Ensure that the level of saturation complements the artistic vision of the music and aligns with the desired tonal characteristics and aesthetic.
Using an exciter or saturator in the mastering process requires a delicate touch and a keen ear for detail. The goal is to enhance the overall richness and presence of the mix while preserving its clarity, transparency, and dynamic range.
Reverb
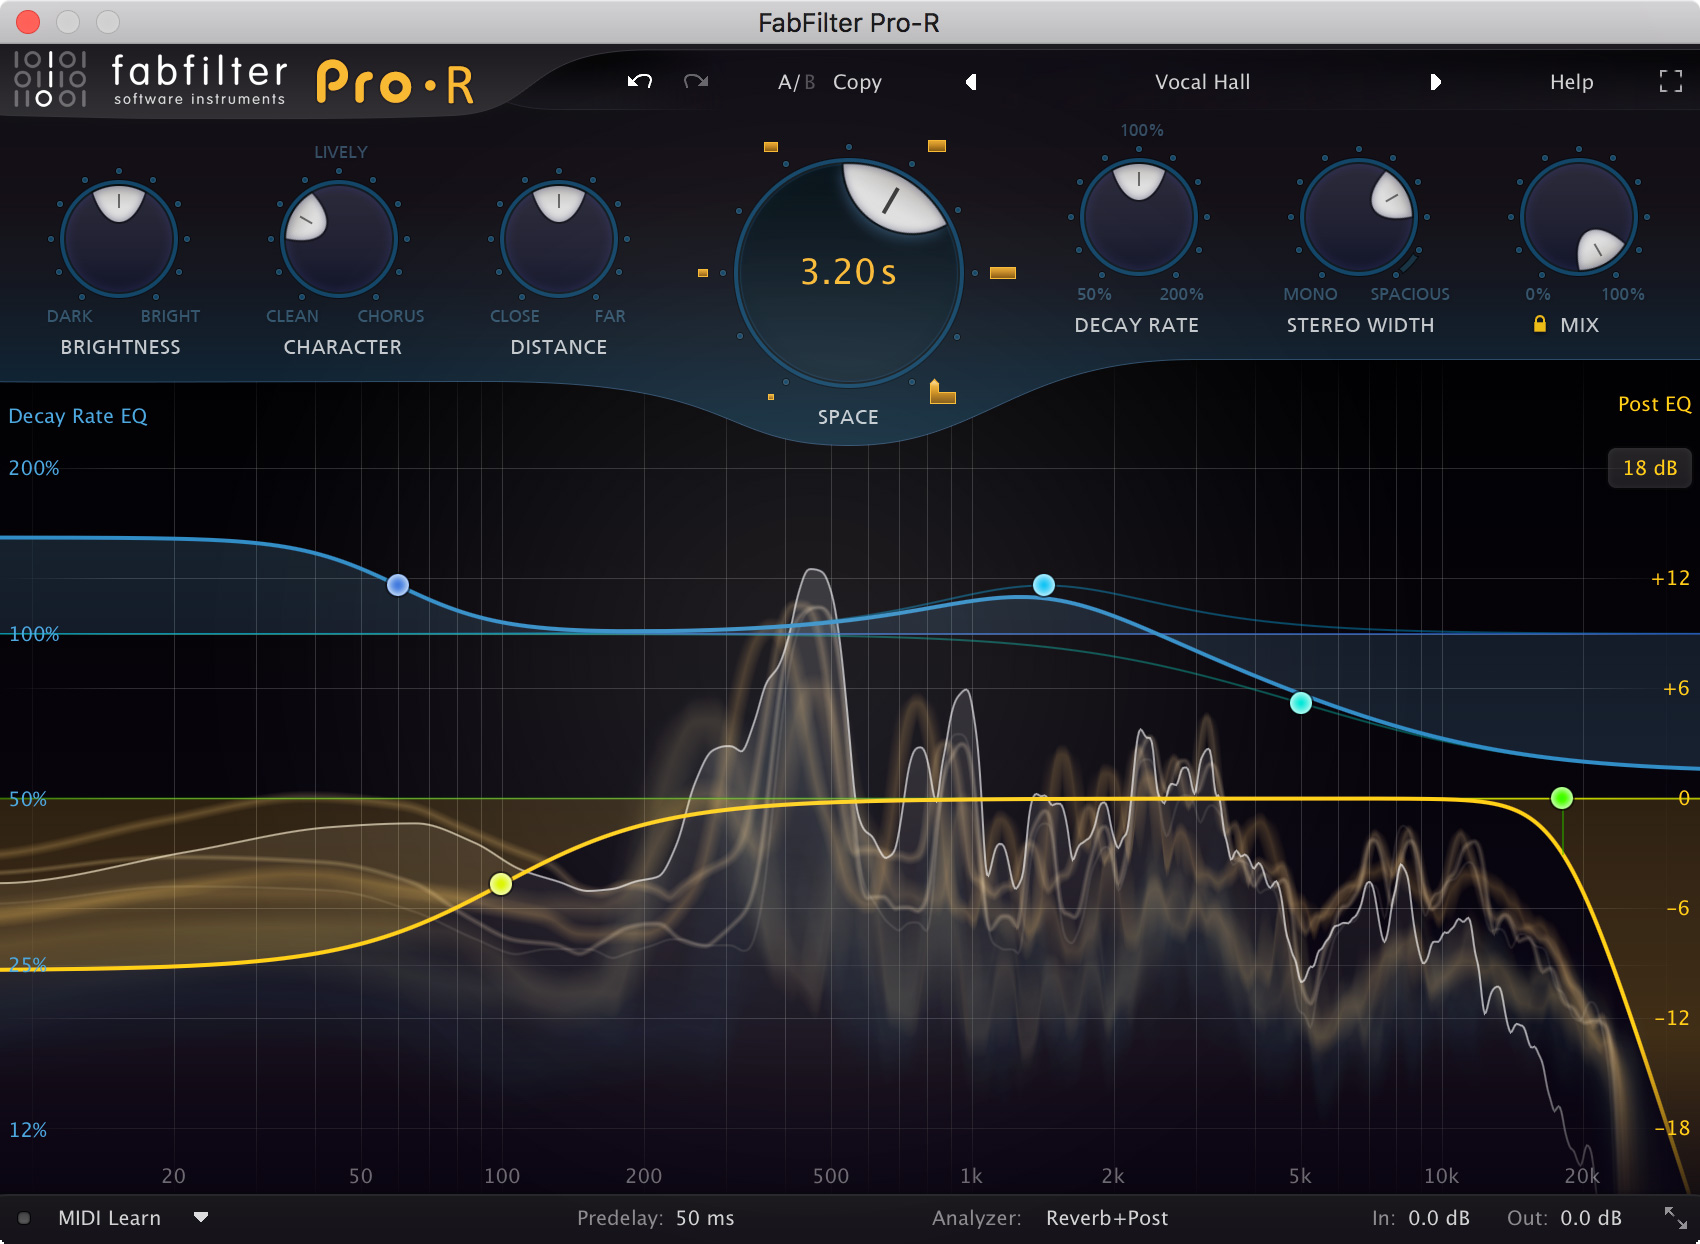
Using reverb in the mastering process is a delicate task that can add depth and ambience to your tracks when applied subtly and tastefully. Here’s a guide on how to effectively use reverb during mastering:
- Enhance spatial depth: Apply reverb to enhance the spatial depth of your mix, providing a sense of space and immersion without overpowering the original sonic elements. Use reverb to create a cohesive and natural-sounding environment for your tracks.
- Consider the mix elements: Identify elements within the mix that would benefit from a sense of space and depth. Focus on instruments or elements that would naturally exist in a room or a performance space, such as vocals, acoustic instruments, or ambient textures.
- Tailor the reverb settings: Customize the reverb settings to match the specific needs of your mix. Adjust parameters such as decay time, pre-delay, and diffusion to create a natural and immersive reverb environment that complements the mood and genre of the music.
- Use short and subtle reverb: Opt for short and subtle reverb settings to maintain the clarity and focus of the mix. Avoid excessive or prolonged reverb tails that can muddy the mix and reduce the overall definition and impact of the individual elements.
- A/B Testing and critical listening: Continuously compare the mix with and without reverb to ensure that the added ambience contributes positively to the overall depth and atmosphere of the tracks. Practice critical listening to ensure that the reverb enhances the mix without overwhelming the original sonic elements.
- Create depth without muddiness: Aim to create a sense of depth and space without introducing any muddiness or congestion within the mix. Use reverb to provide a transparent and natural-sounding environment that complements the original sonic characteristics of the music.
- Consider the listening environment: Consider the intended listening environment when applying reverb. Ensure that the reverb settings translate well across various playback systems and environments, providing an immersive and engaging listening experience for your audience.
Using reverb in the mastering process demands careful consideration of the mix elements and an understanding of how to create a natural and immersive sonic environment. The goal is to enhance the overall depth and atmosphere of the tracks while preserving their clarity, definition, and impact.
Dynamic EQ
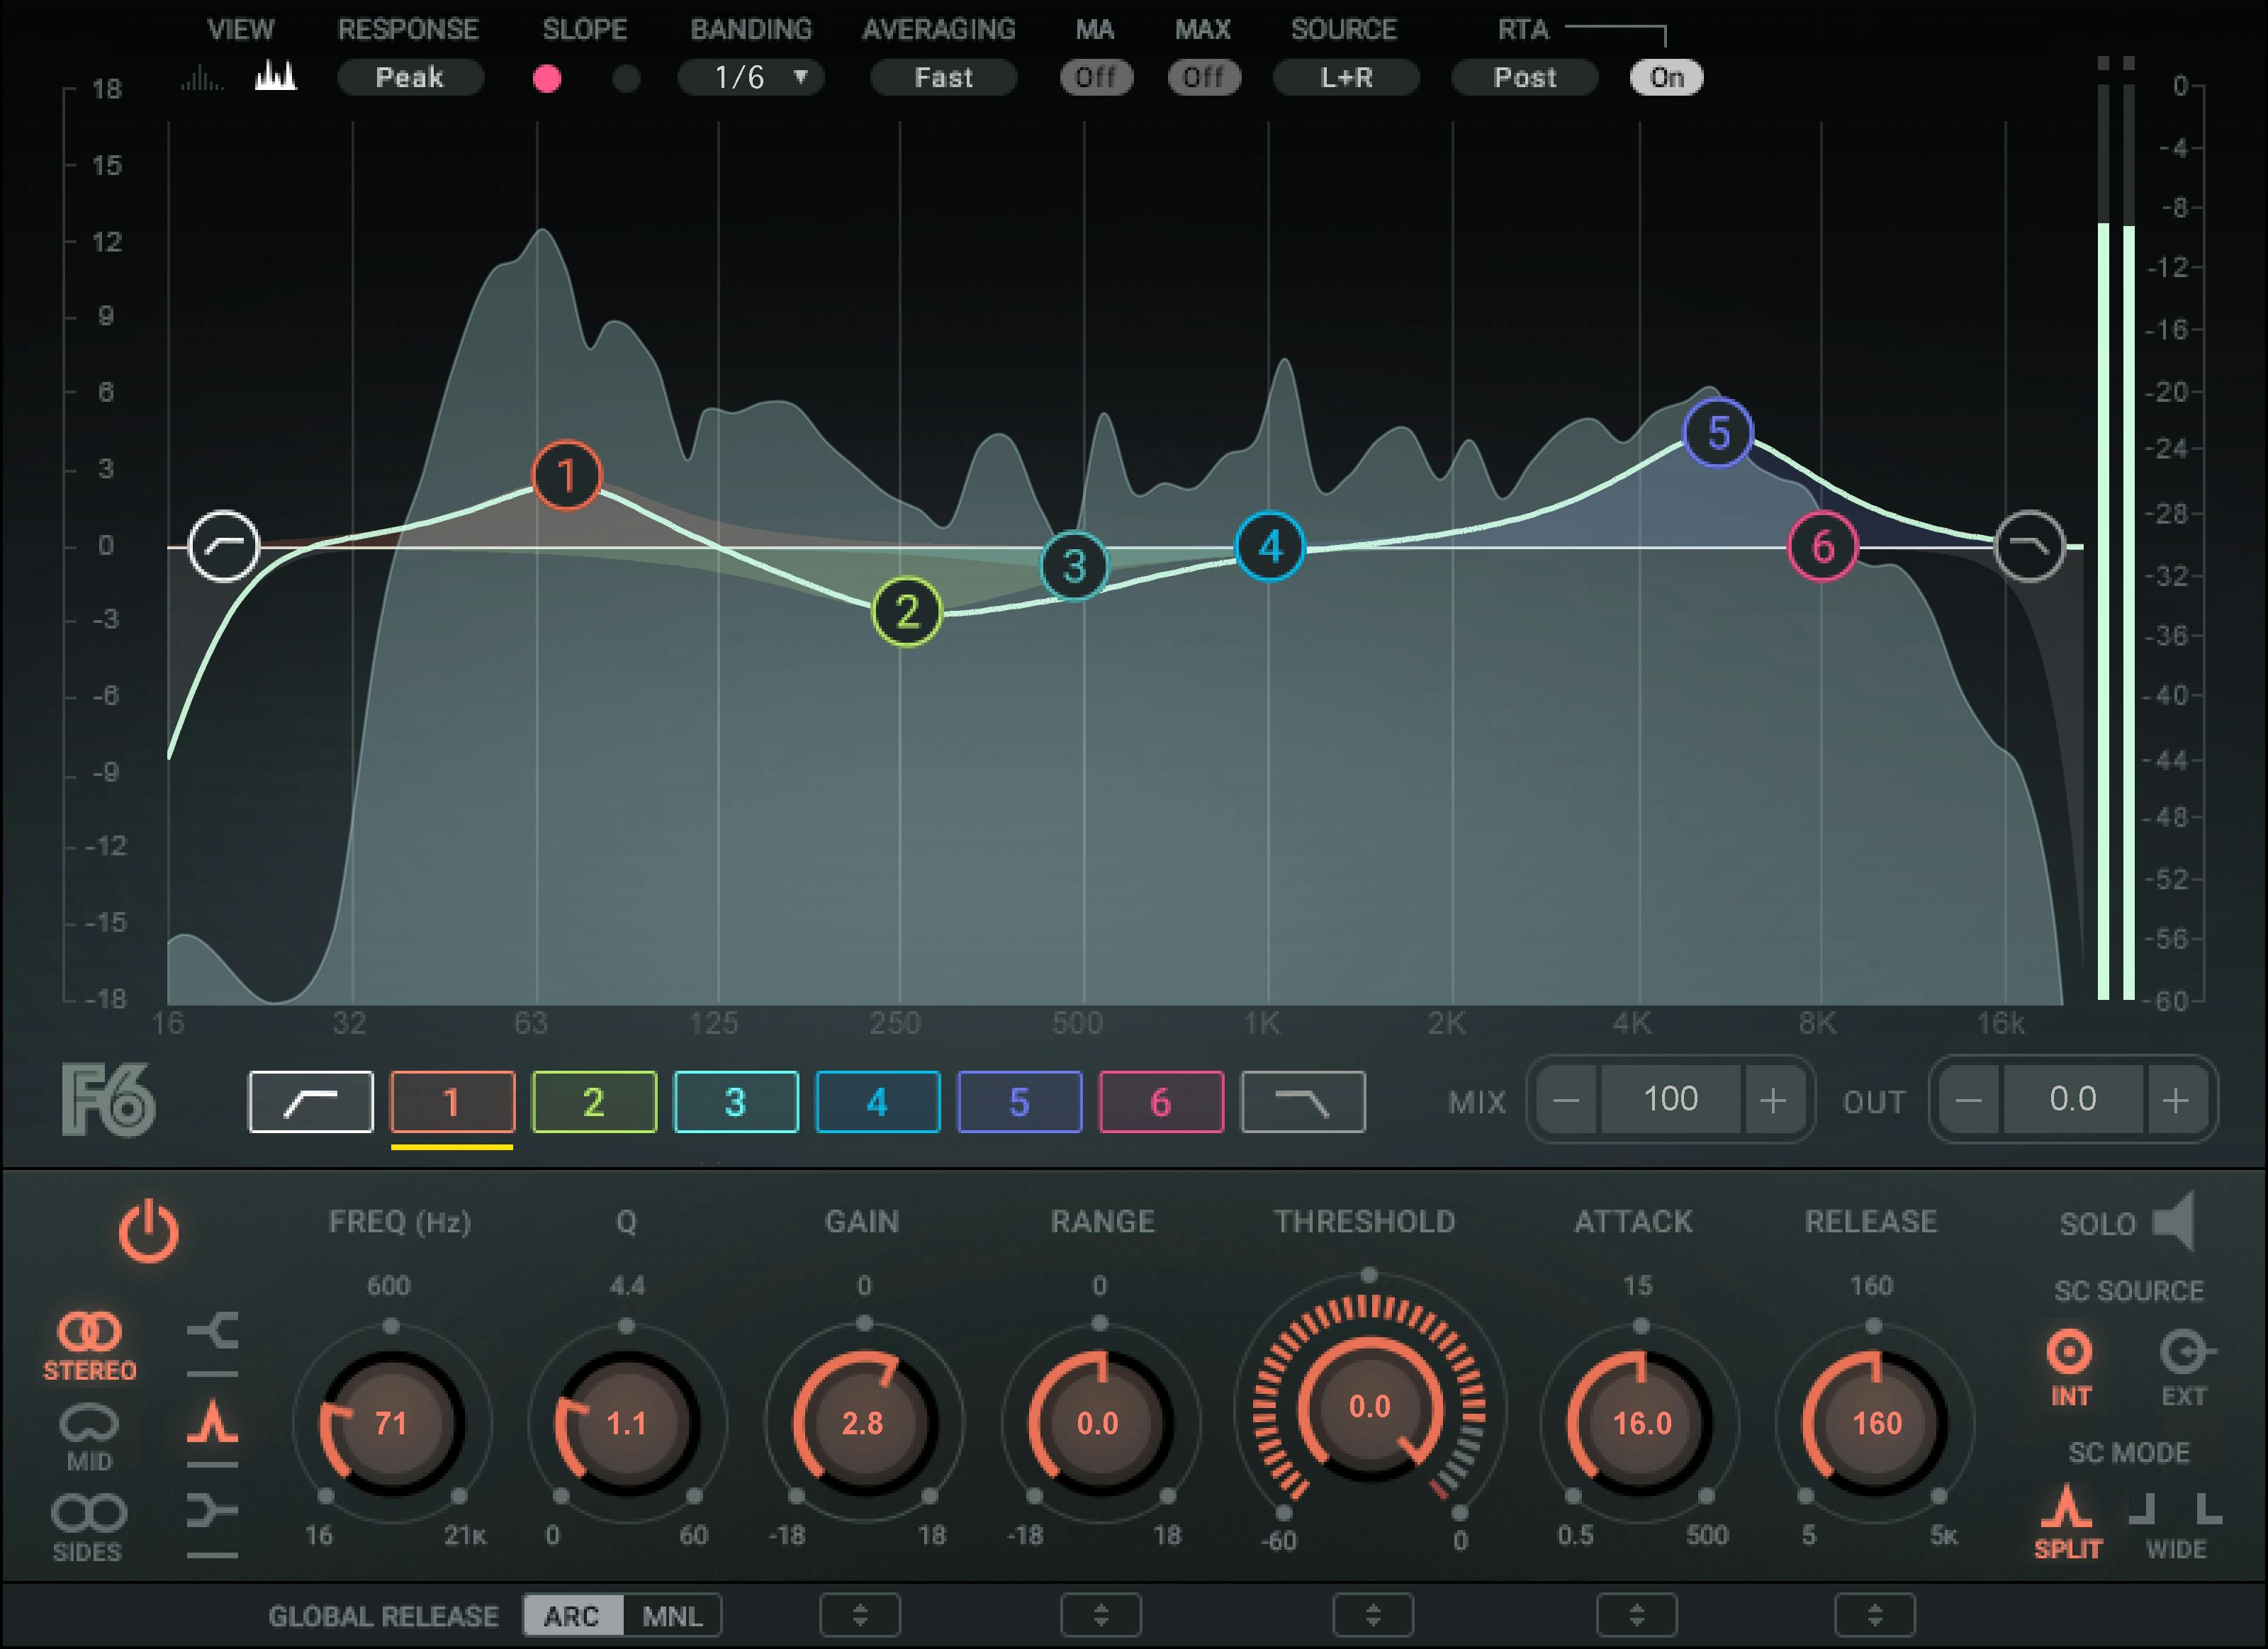
Using a dynamic EQ in the mastering process allows for precise control over specific frequencies that require dynamic adjustments, ensuring a polished and balanced final mix. Here’s a guide on how to effectively use a dynamic EQ during mastering:
- Identify problematic frequency ranges: Listen to the mix and identify any problematic frequency ranges that require dynamic adjustments. Focus on areas that fluctuate in intensity or cause masking issues between different elements within the mix.
- Set thresholds and bands: Set the thresholds for each frequency band, determining the level at which the dynamic EQ will start to apply attenuation or boost. Adjust the bandwidth and Q factor to target specific frequencies with precision.
- Apply gentle compression or expansion: Apply gentle compression to attenuate problematic frequencies, or use expansion to boost subtle elements that require additional presence. Ensure that the dynamic processing remains transparent and does not introduce any artifacts or unnatural tonal changes.
- Monitor the gain reduction and band activity: Keep an eye on the gain reduction meter and band activity to ensure that the dynamic EQ is effectively controlling any frequency inconsistencies without altering the overall tonal balance of the mix.
- Use sidechain for frequency carving: Utilize the sidechain feature to create frequency carvings that allow certain elements to cut through the mix more effectively. Use this technique to prevent masking and ensure that each element retains its clarity and definition.
- A/B Testing and critical listening: Continuously compare the dynamic EQ’ed and non-EQ’ed versions of the mix. Practice critical listening to ensure that the dynamic EQ is addressing any frequency issues without affecting the overall tonal balance and musicality of the track.
- Maintain transparency and musicality: Aim to maintain the transparency and musicality of the mix while using the dynamic EQ to control problematic frequencies. Avoid over-processing and excessive manipulation that could potentially alter the intended tonal balance and dynamics of the music.
Using a dynamic EQ in the mastering process demands a nuanced understanding of the mix and a delicate touch to ensure that the frequencies are controlled without sacrificing the overall musicality and integrity of the track.
Multimeter Analyzer

Using a multimeter analyzer in the mastering process allows you to monitor the frequency spectrum, stereo image, and dynamic range of your tracks in real-time, providing valuable insights into the technical aspects of your audio. Here’s a guide on how to effectively use a multimeter analyzer during mastering:
- Monitor frequency spectrum: Use the multimeter analyzer to monitor the frequency spectrum of your tracks. Pay attention to the distribution of frequencies across the audio spectrum, ensuring that each element is well-balanced and has its own space within the mix.
- Check stereo image: Evaluate the stereo image of your tracks using the multimeter analyzer. Ensure that the stereo width is consistent and that the elements are appropriately positioned within the stereo field, creating a cohesive and immersive listening experience.
- Assess dynamic range: Monitor the dynamic range of your tracks to ensure that the peaks and transients are well-controlled without any excessive compression or limiting artifacts. Maintain a balanced dynamic range that allows the music to breathe naturally and retain its impact.
- Identify frequency imbalances: Use the multimeter analyzer to identify any frequency imbalances or masking issues that may be affecting the overall tonal balance of the mix. Address these imbalances through targeted EQ adjustments or dynamic processing to achieve a more polished and refined sound.
- Reference target standards: Compare the analyzed data with target standards for frequency response, stereo width, and dynamic range. Use this comparison to ensure that your tracks meet industry standards and sound consistent across different playback systems.
- A/B Testing and critical listening: Continuously switch between the analyzed and non-analyzed versions of the mix. Practice critical listening to ensure that the data provided by the multimeter analyzer aligns with your subjective perception of the mix and that any necessary adjustments are made accordingly.
- Optimize for various playback systems: Consider the different playback systems and environments in which your tracks will be heard. Adjust the mix to ensure that it translates well across various devices and platforms, providing an optimal listening experience for your audience.
Using a multimeter analyzer in the mastering process empowers you to make informed decisions about the technical aspects of your mix, ensuring that it meets industry standards and delivers a high-quality listening experience across different playback systems.
De-Esser
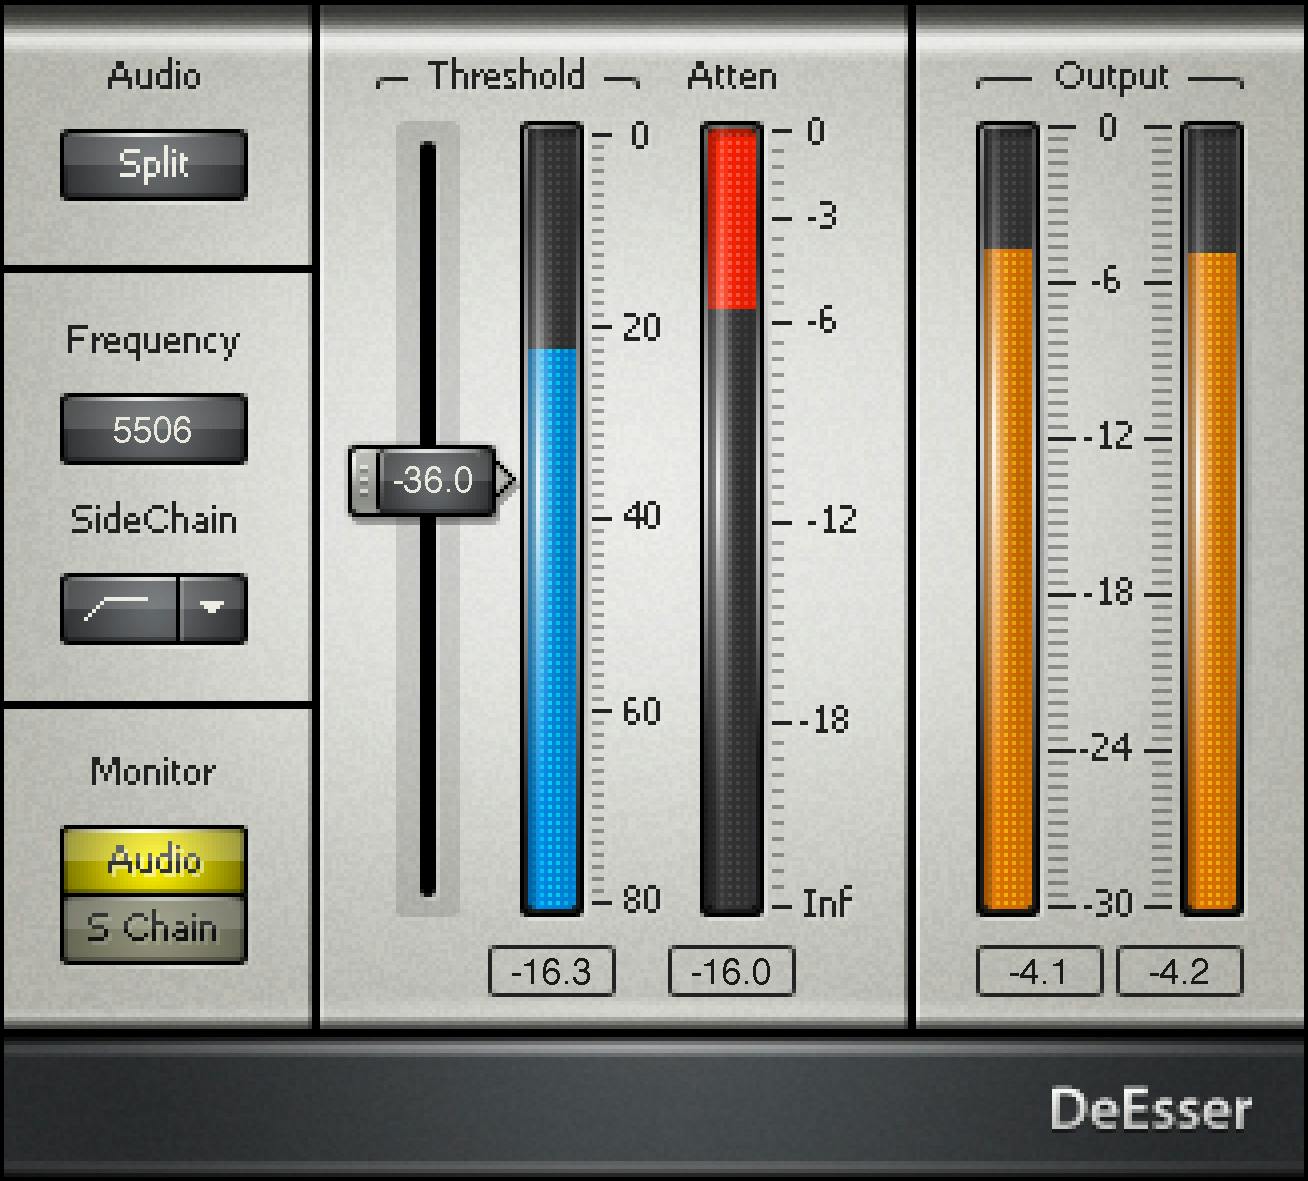
Using a de-esser in the mastering process is a critical step to control sibilance and harshness in vocal tracks or high-frequency elements, ensuring a smooth and polished final mix. Here’s a guide on how to effectively use a de-esser during mastering:
- Identify sibilant elements: Listen to the mix and identify any sibilant or harsh elements, particularly in vocal tracks or high-frequency instruments. Focus on the ‘s’, ‘sh’, and ‘ch’ sounds that can contribute to an overly bright or piercing sonic character.
- Set the threshold and frequency range: Set the threshold of the de-esser to target the specific frequency range containing the sibilant sounds. Adjust the frequency range to capture the problematic frequencies without affecting the natural tonal balance of the vocals or instruments.
- Apply gentle reduction: Apply gentle reduction to the targeted frequency range to tame the sibilance without overly attenuating the overall high-frequency content. Ensure that the de-esser’s processing remains transparent and does not introduce any artifacts or tonal alterations.
- Monitor gain reduction and band activity: Keep an eye on the gain reduction meter and band activity to ensure that the de-esser is effectively controlling the sibilance without affecting the natural timbre and clarity of the vocals or instruments.
- Use sidechain for precise control: Utilize the sidechain feature to achieve precise control over the sibilant frequencies while preserving the overall tonal balance and character of the mix. Adjust the sidechain filter to target specific elements and prevent any unintended processing artifacts.
- A/B Testing and critical listening: Continuously switch between the de-essed and non-de-essed versions of the mix. Practice critical listening to ensure that the de-esser is effectively reducing the sibilance without introducing any unnatural artifacts or affecting the overall tonal balance and clarity.
- Maintain natural vocal sound: Aim to maintain the natural character and clarity of the vocals or instruments while using the de-esser to control the sibilance. Avoid over-processing that could potentially dull the high-frequency content and compromise the intelligibility and presence of the vocals or instruments.
Using a de-esser in the mastering process requires a delicate touch and a keen ear for detail to ensure that the sibilant elements are controlled without sacrificing the natural character and intelligibility of the vocals or instruments.
Mastering is a delicate art that demands both technical expertise and creative finesse. By incorporating these essential plugins into your mastering chain, you can achieve professional-grade results that captivate your audience and elevate your music to new heights of sonic excellence.
Remember – RouteNote Create subscriptions start from as little as $2.99. You also get 10 FREE credits to spend on samples along with access to our FREE sample pack bundle when you sign-up!